
4 Bullish Confirmations at Demand – Beginner Breakdown
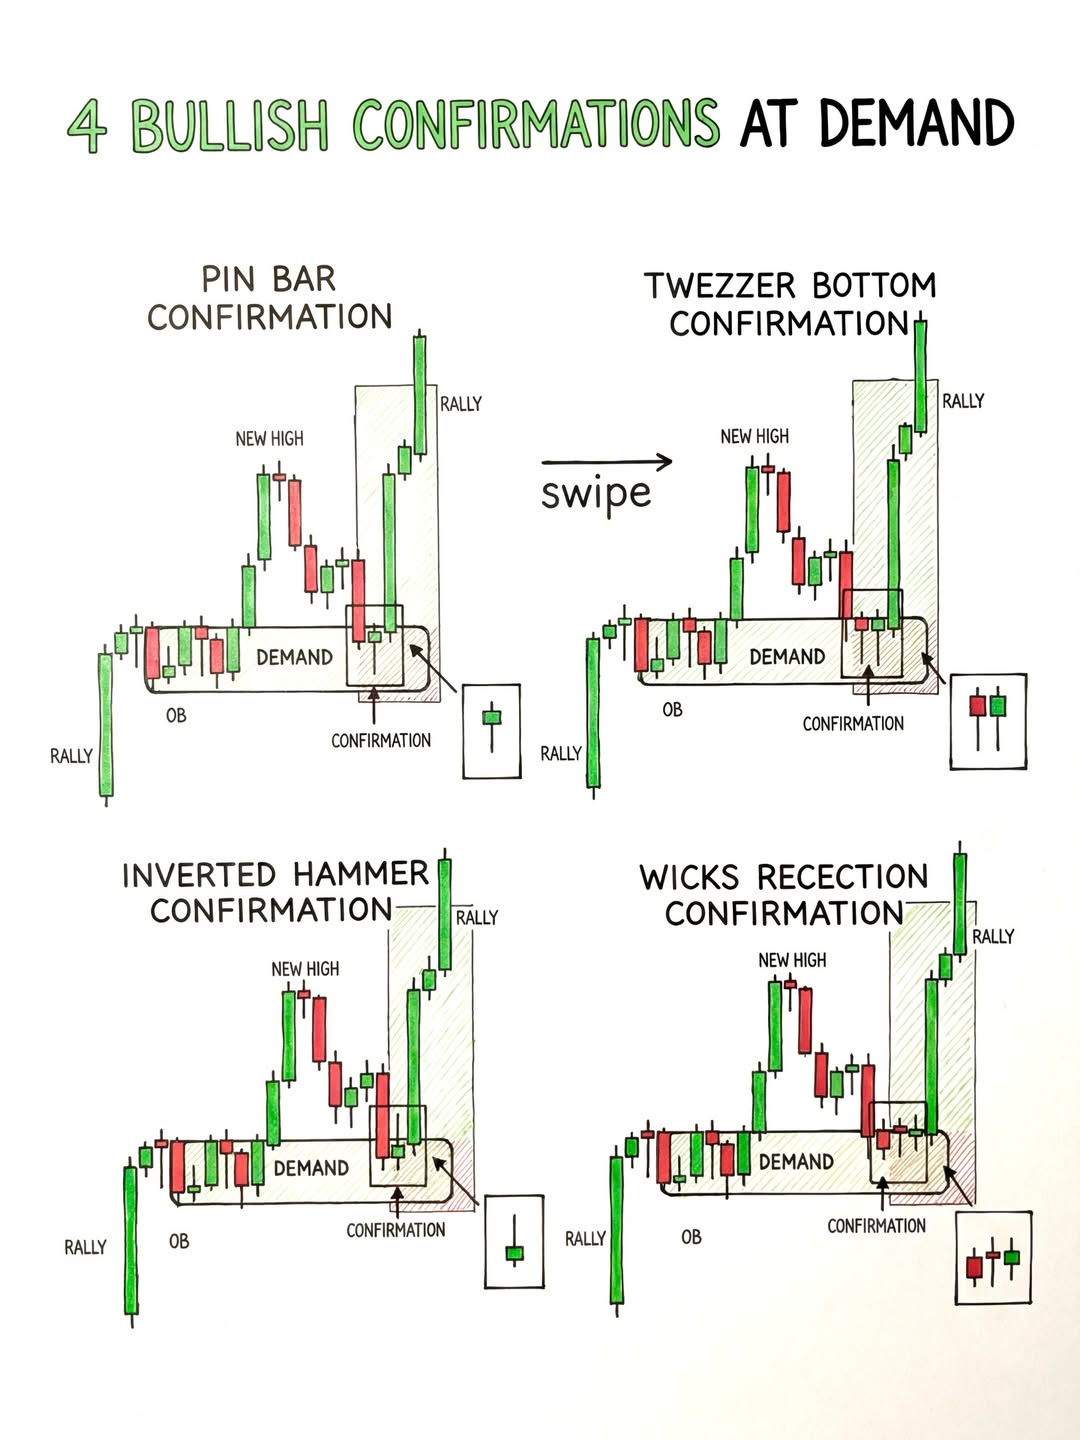
All four setups share the same context: price rallies up, makes a new high, pulls back into a demand zone (where buyers previously stepped in, marked with an order block/OB), and you're looking for a specific candlestick pattern as your confirmation to go long before the next rally.
1. Pin Bar Confirmation
When price returns to the demand zone, you see a pin bar — a candle with a very long lower wick and a small body near the top. This means sellers tried to push price down but buyers aggressively rejected it. The long wick "pins" off the demand zone = strong bullish signal.
2. Tweezer Bottom Confirmation
Price taps the demand zone and forms two candles with matching lows (the "tweezers"). The first candle is typically bearish (red), the second bullish (green). Two attempts to break lower both fail at the same price = buyers are defending that level strongly.
3. Inverted Hammer Confirmation
Similar to a pin bar but with the long wick on top and a small body at the bottom. It forms at the demand zone and signals that despite sellers pushing during the candle, the close held near the open at support. The next candle going green confirms the reversal.
4. Wicks Rejection Confirmation
Multiple candles in a row show long lower wicks at the demand zone. It's not one dramatic candle — it's a cluster of repeated rejections. Think of it as buyers saying "no" over and over. This repeated wick rejection is a slower but very reliable confirmation of demand holding.
Key takeaway: Never just blindly buy at a demand zone. Wait for one of these candlestick confirmations to appear at the zone — it's your proof that buyers are actually showing up before you risk your money.