
A thorough explanation of the terms of trade
Introduction
We operate GogoJungle / Skijan, Gogojan Co., Ltd.
This time, for those who have understood the basics of using EA Creator, we will delve deeper into setting trading conditions, explaining the concepts and how to configure them.
If you are new to EA Creator or have not yet created an EA, please check the past articles from the links below.
・Basic operations and how to use EA Creator
Table of Contents
・Basics of the Trading Conditions Screen
・About Logical Operators (AND/OR)
・Detailed Settings of Trading Conditions
・Duplication of Trading Conditions
・Conclusion
Basics of the Trading Conditions Screen
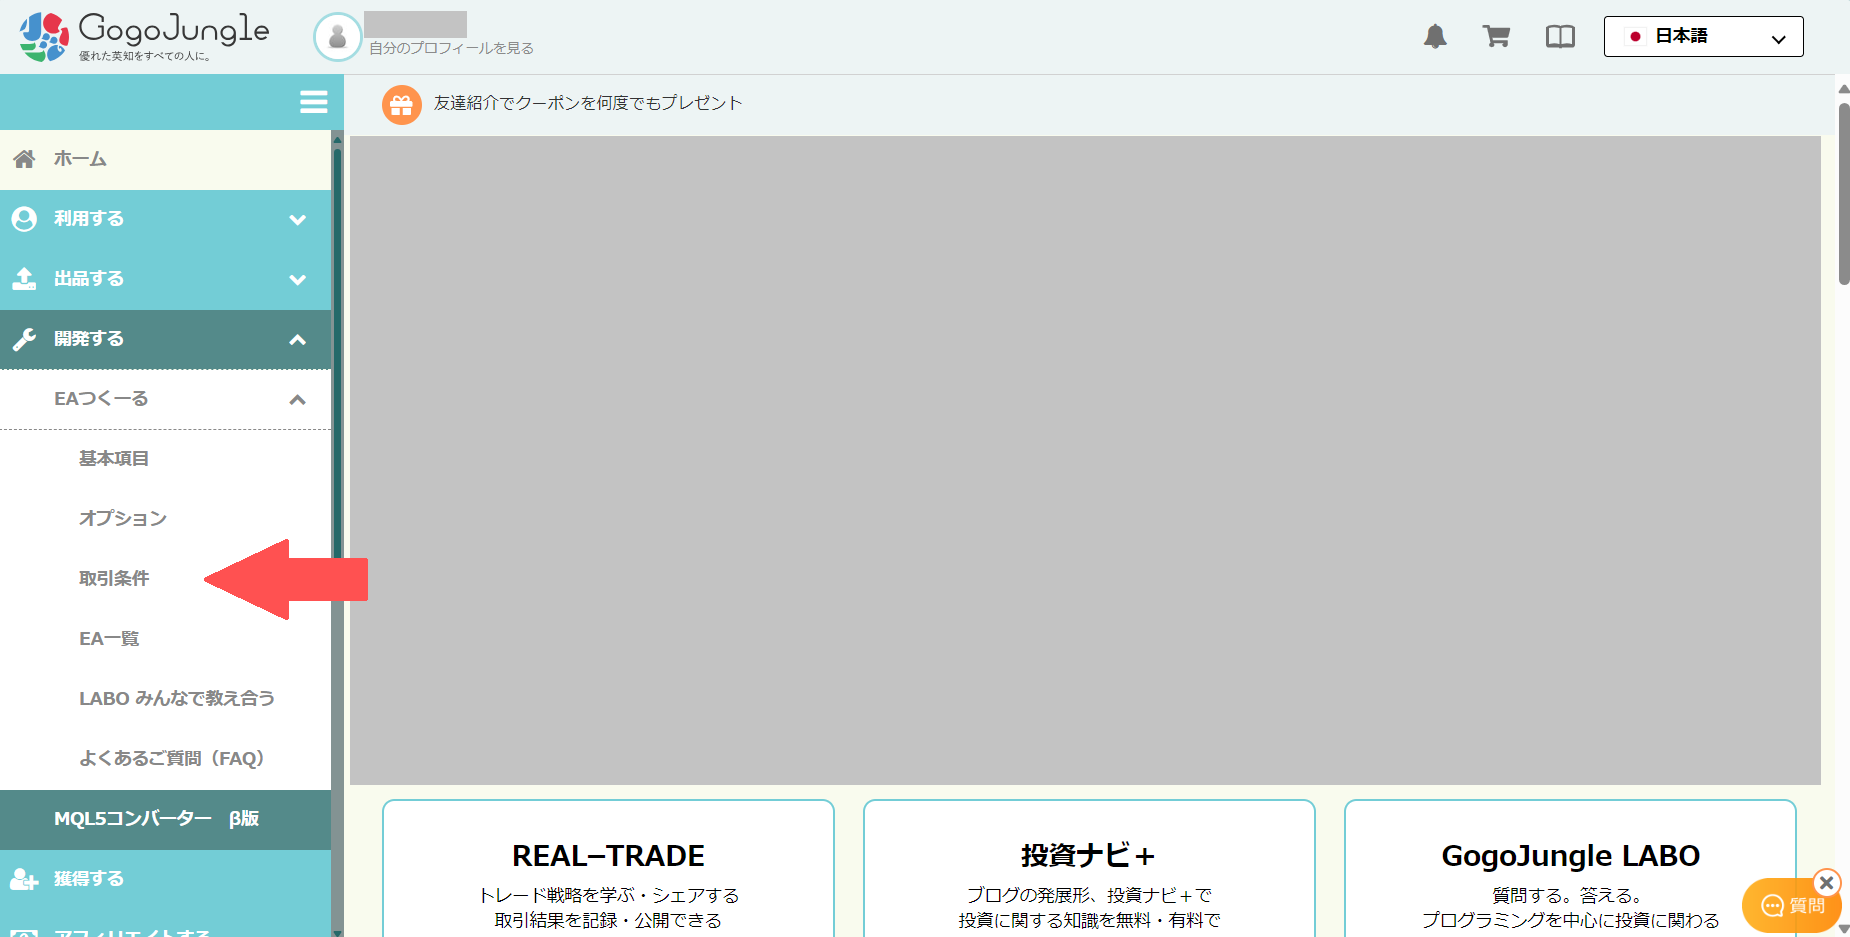
First, let's open the basic trading condition settings screen.
Develop -> EA Creator -> Trading Conditions
On the screen below, you can program trades to execute when the configured conditions are met, such as a buy entry, a sell entry, or the closing of a position.
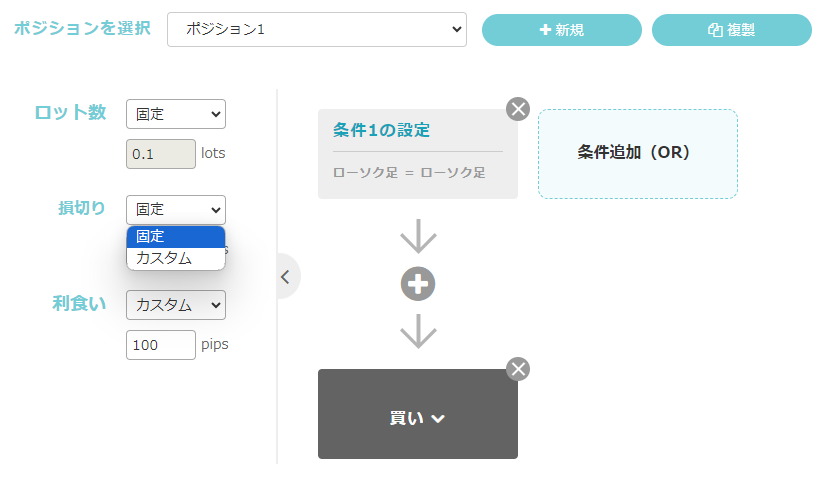
Per Position individual settings (\"Lot size\", \"Stop loss\", \"Take profit\")If you want to apply per-position settings, select Custom and modify the values.
※Custom input values take precedence over the basic items
Now, we will introduce the functions of the trading screen one by one.
Some feature names remain in older wording (for example, the “+ New” button is labeled “+ Add Position”).
About Logical Operators (AND/OR)
Conditions and Trades
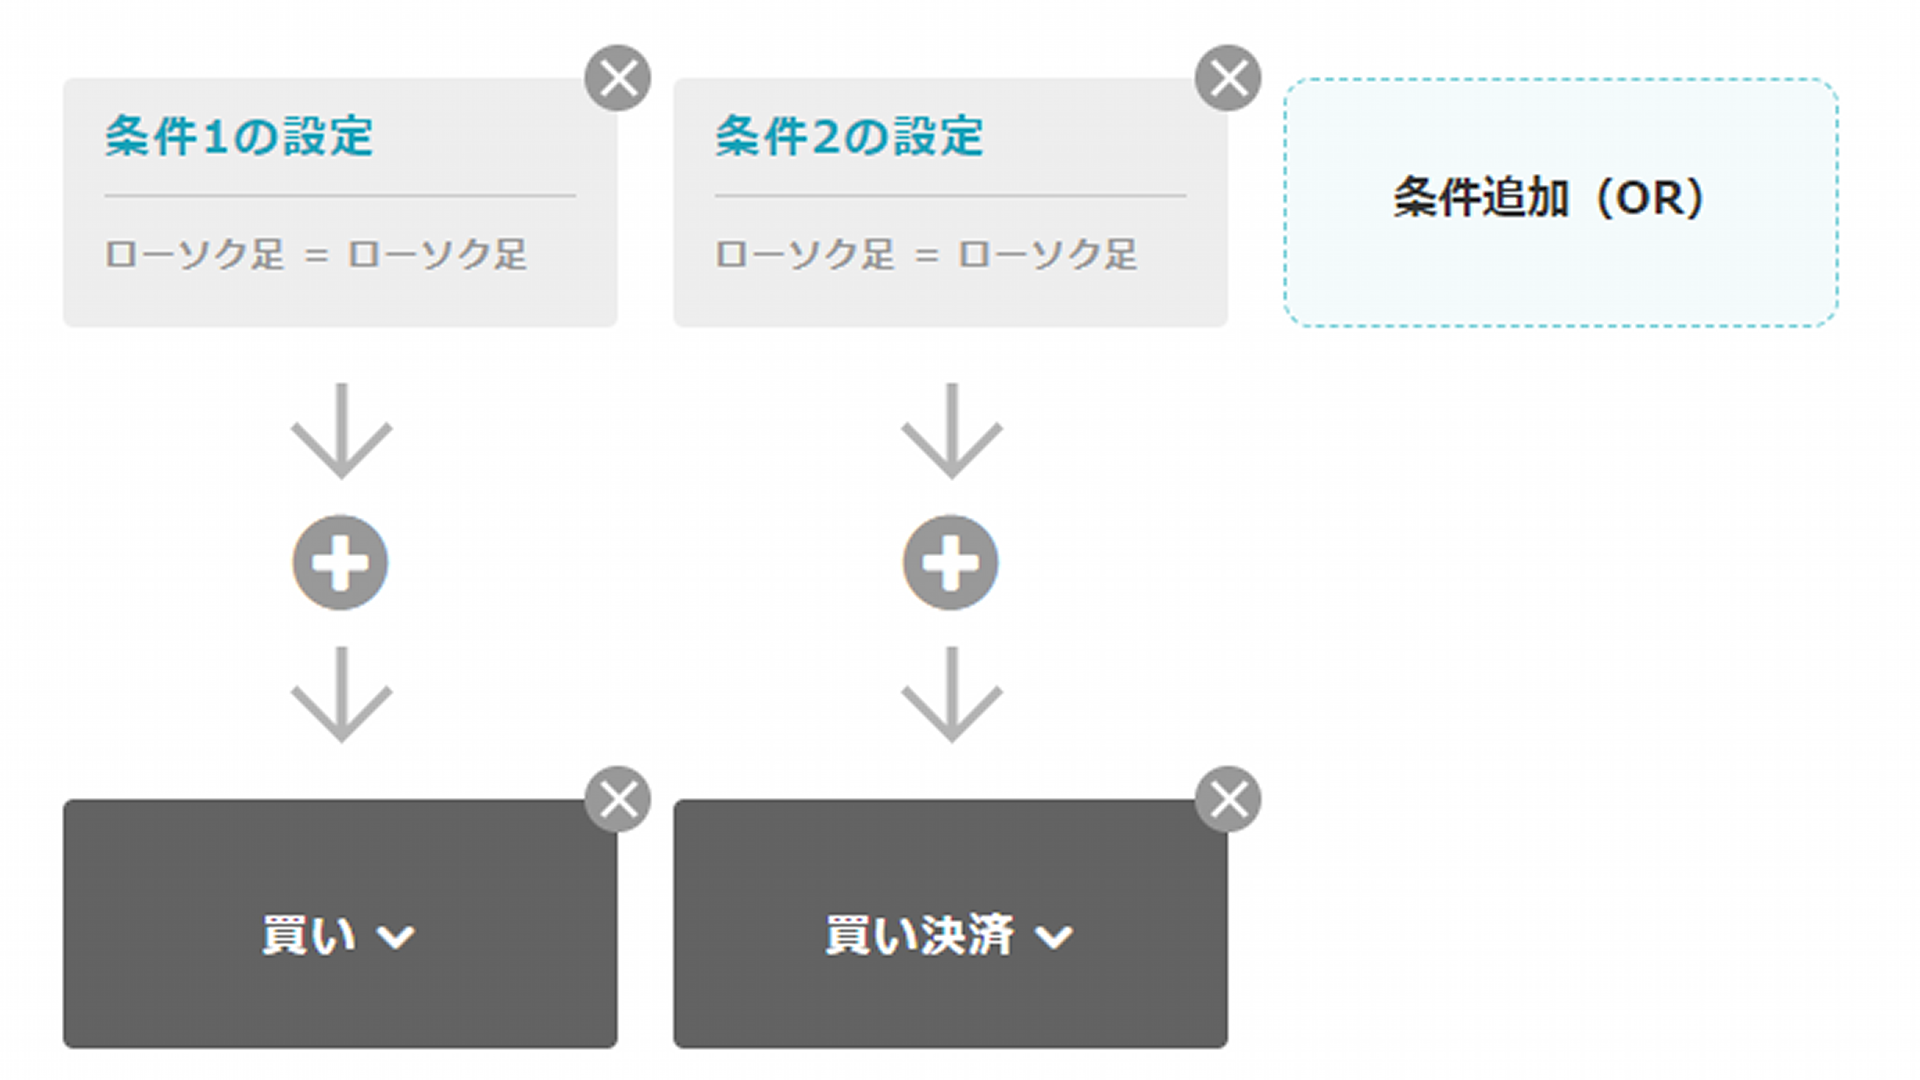
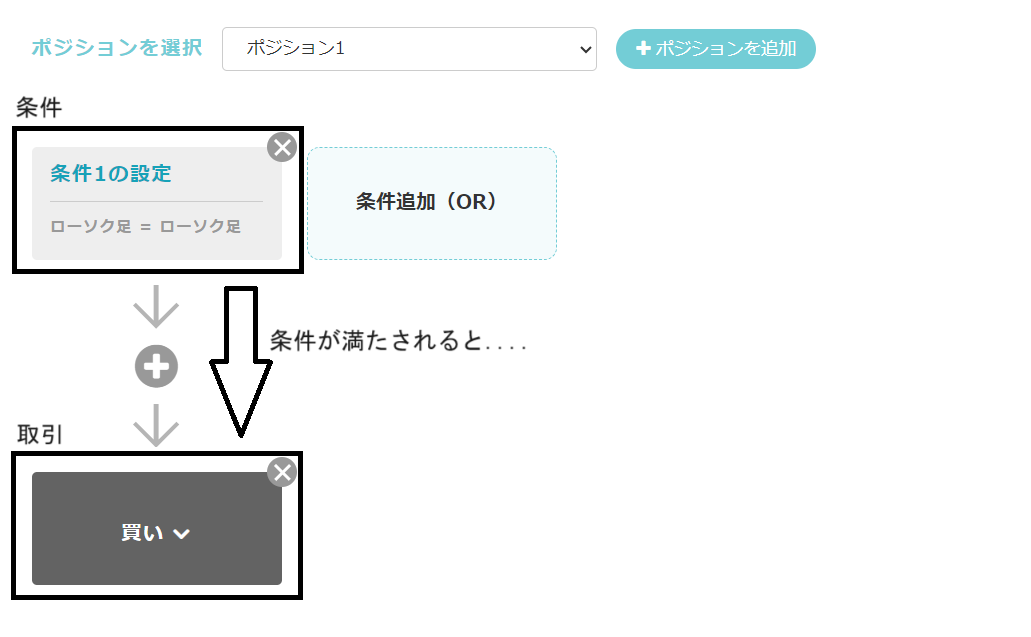
First, let's review the basic conditions and the process of executing trades when they are met.
As in the image below, if there is a single condition, when the condition set at the top is satisfied, the bottom trade is executed.
Think of the program as typically flowing from top to bottom and executing accordingly.
Adding an AND Condition
Next, let's explain how to add an AND condition.
An AND condition is an additional condition that appears when you press the + (plus) inside the red framed area in the image below.
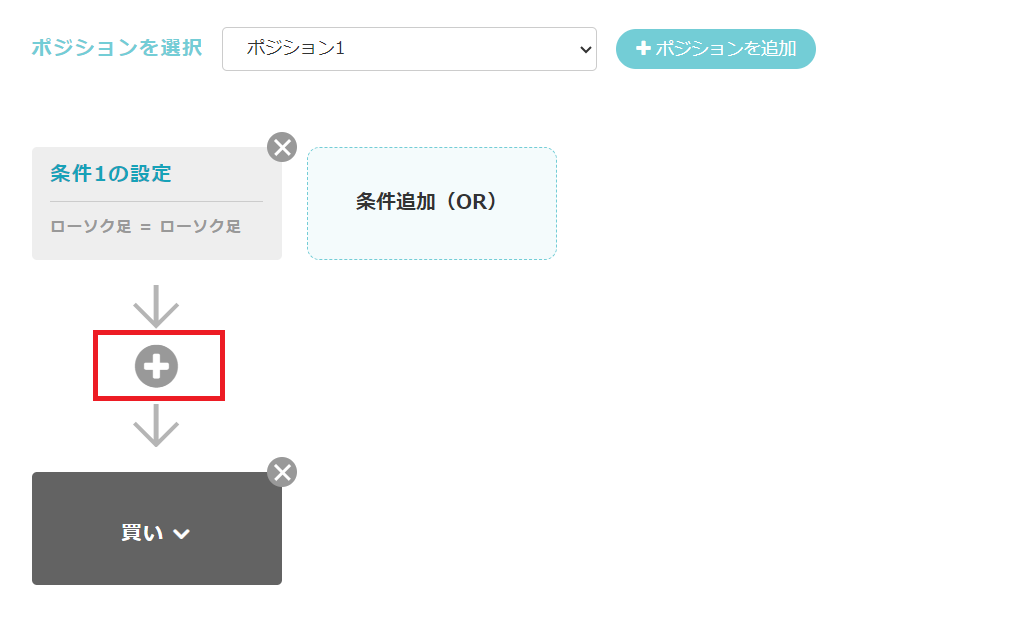
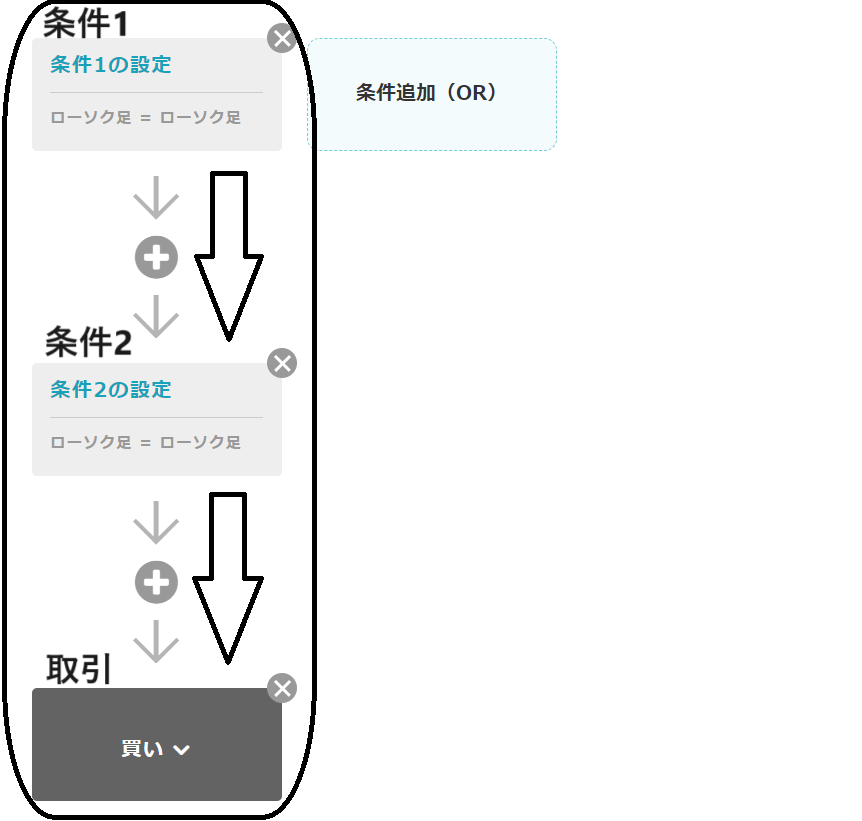
In other words, a trade will not be executed if only one of the conditions is satisfied.
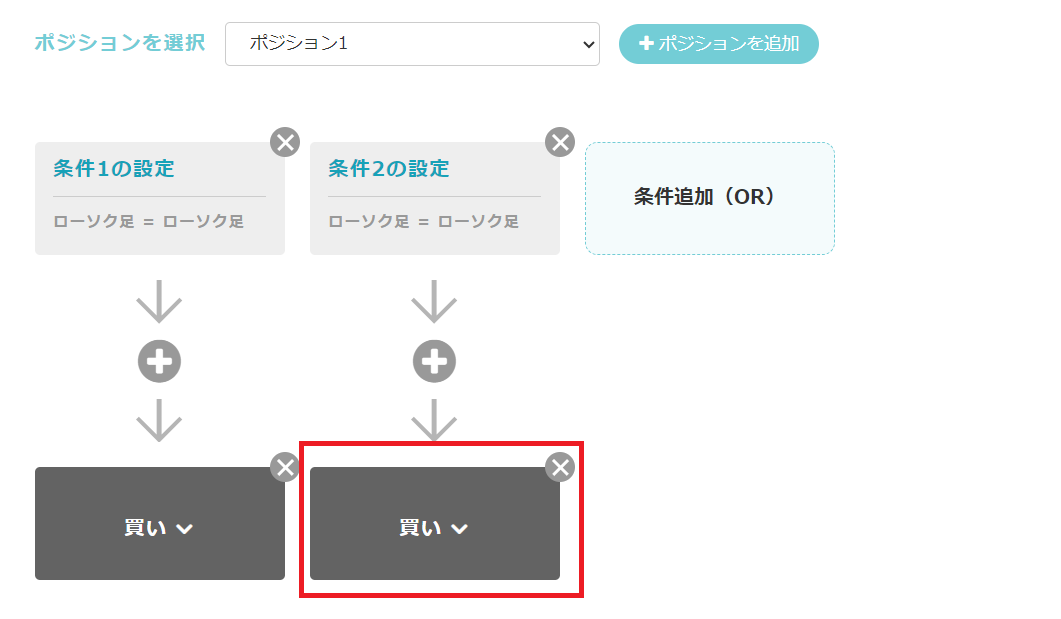
Adding an OR Condition
Next, let's explain how to add an OR condition.
An OR condition is a new condition that appears when you press “Add Condition (OR)” in the red framed area below the image.
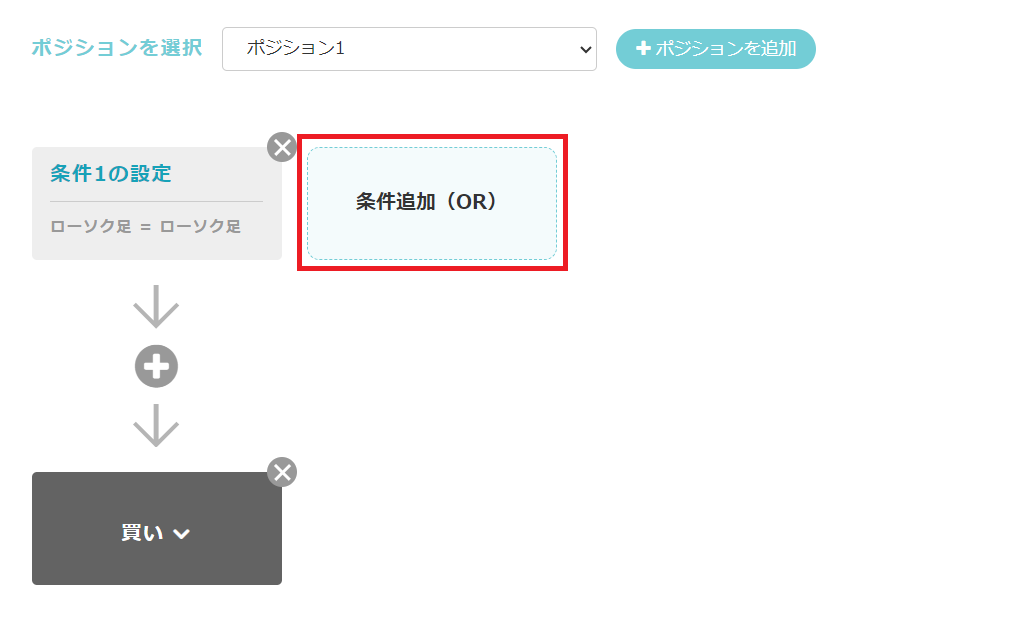
Unlike the previous AND condition, if Condition 2 alone is met, the corresponding trade is executed even if Condition 1 is not met.
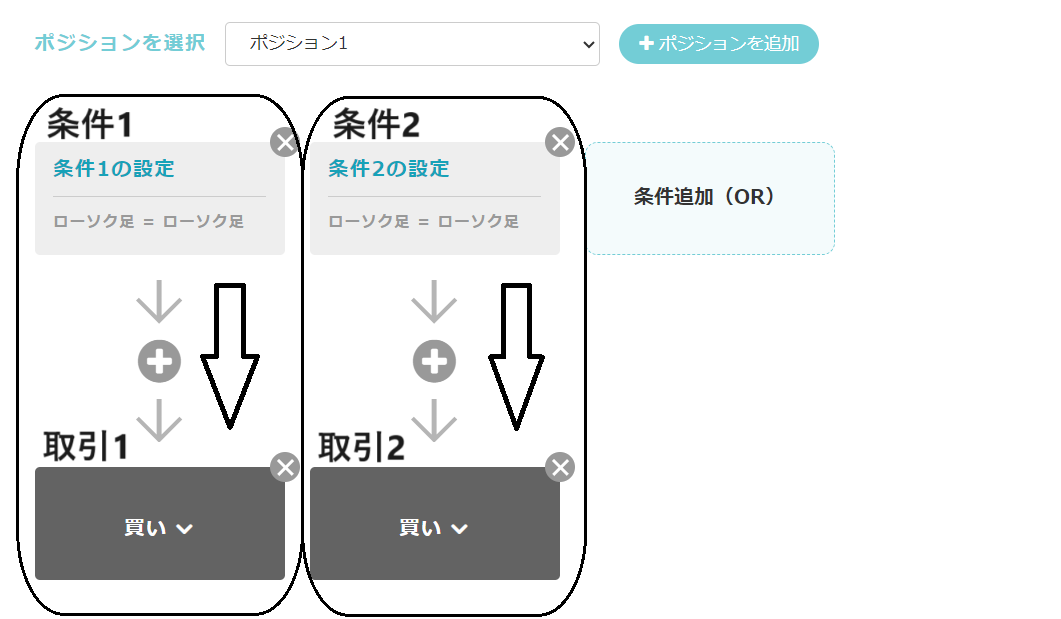
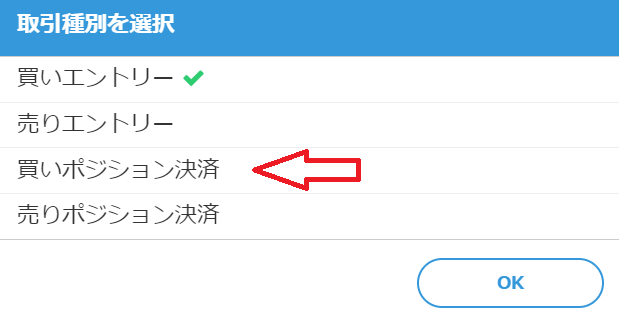
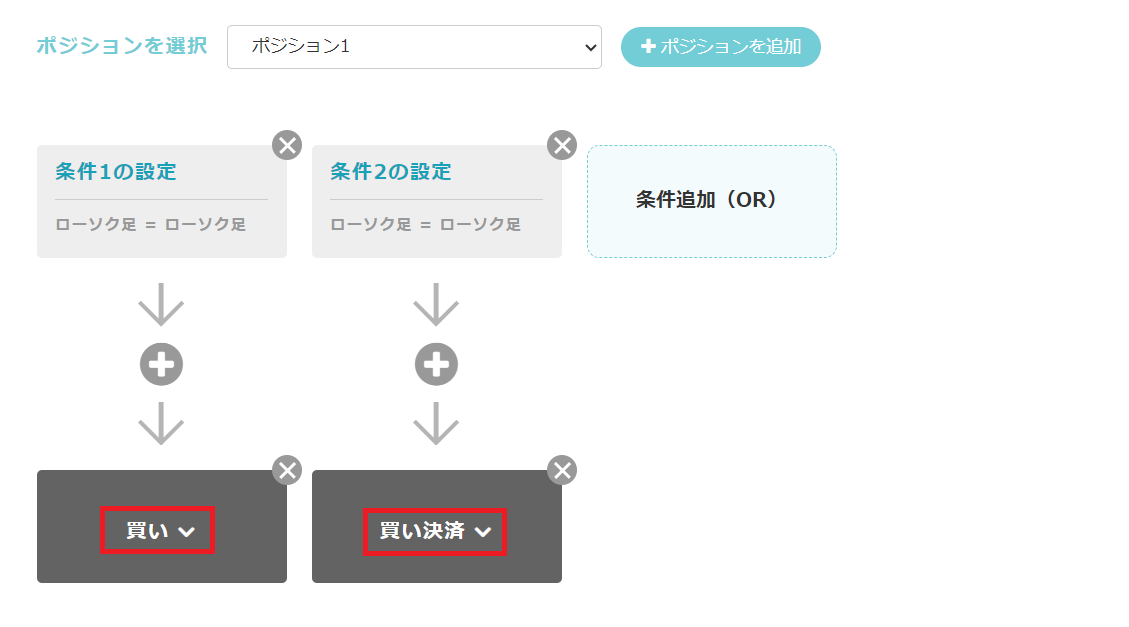
If you only added OR conditions as above, the buy entry would be executed whether Condition 1 or Condition 2 is met, so press the button in the red frame and change it to “Close Buy Position” as shown in the image below.
From the “Select Trade Type” popup, choose the desired item and press OK.
Now you can change the trade type for each condition.
This trading conditions screen can be a bit complex, so it may take some time to learn. Practice by actually setting these AND and OR conditions to see practical usage.
Detailed Settings of Trading Conditions
Next, we will introduce the detailed settings of trading conditions.
Try pressing the condition settings inside the red frame.
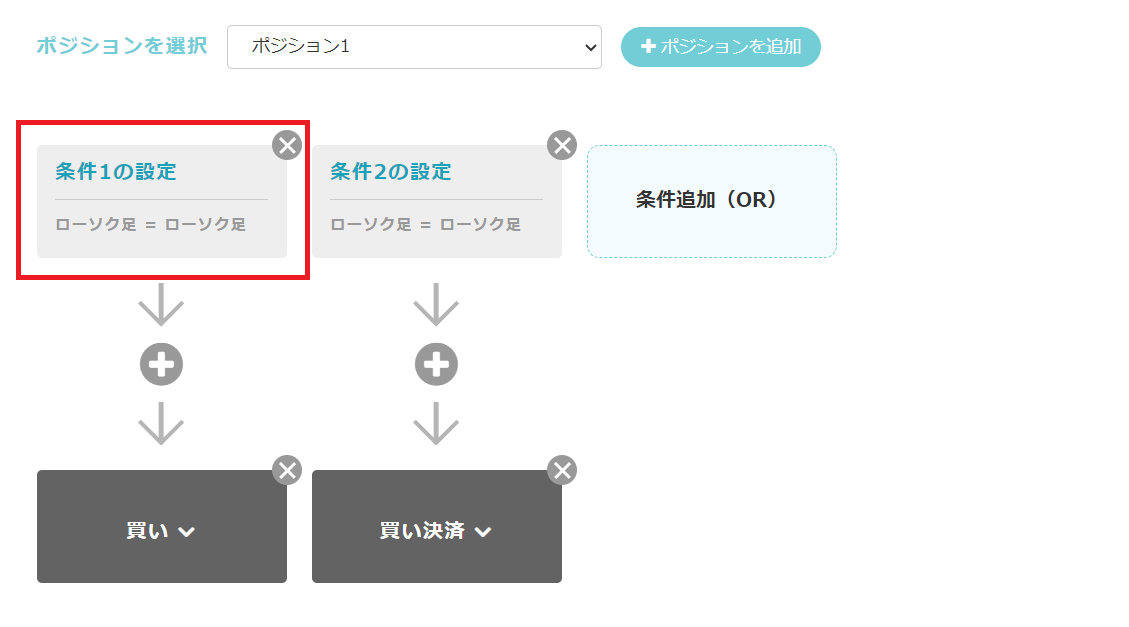
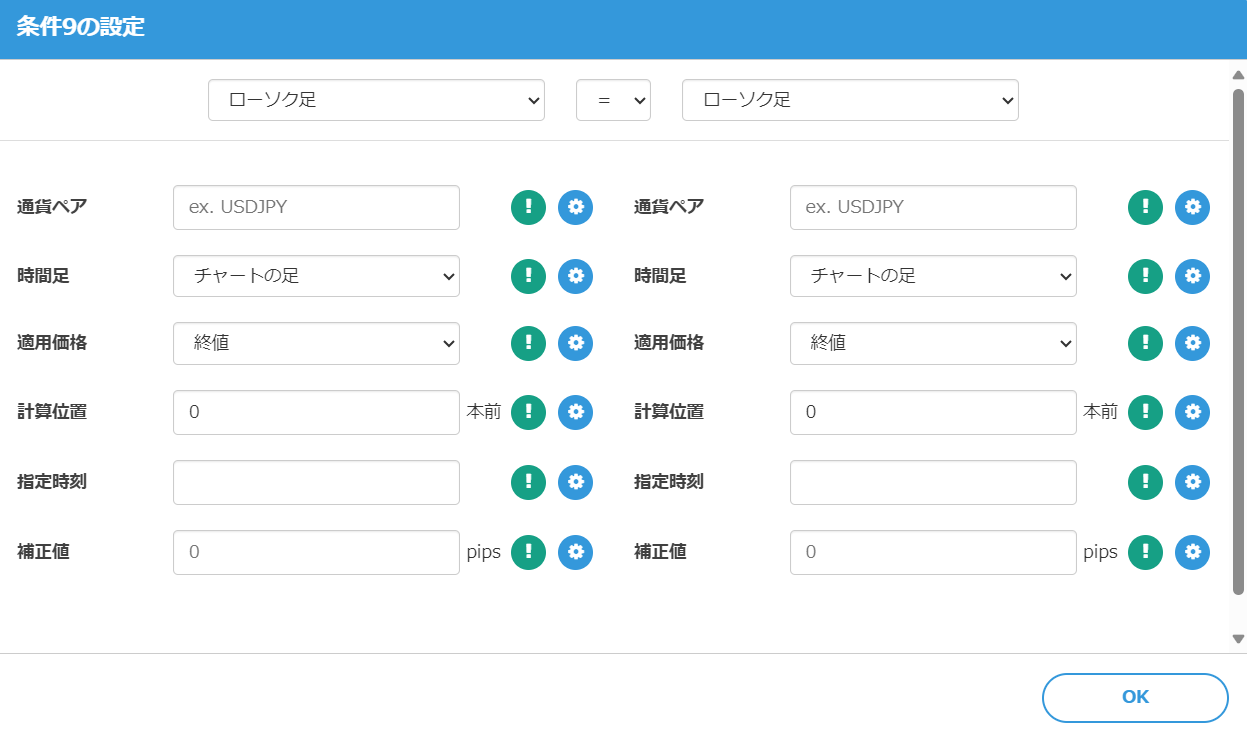
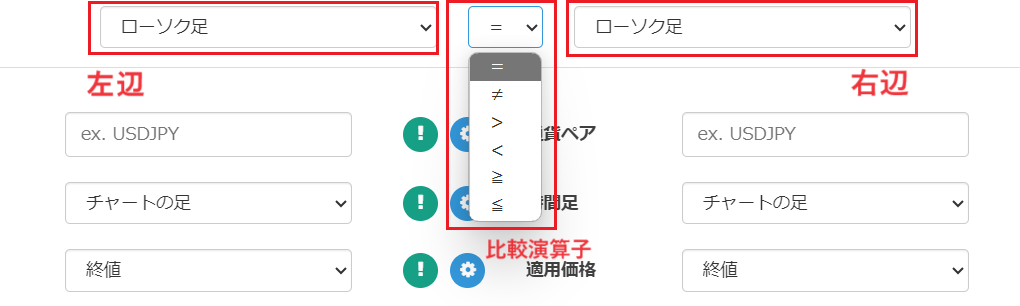
In the default settings, both sides are “Candlesticks,” and the comparison operator is = (equals). Use this dropdown to select any item and configure the condition.
When this condition is met, it is considered satisfied and the trade is executed, or the process moves to the next condition.
The image below is an example condition: “The close of the candlestick exceeds the moving average value for 21 periods.”
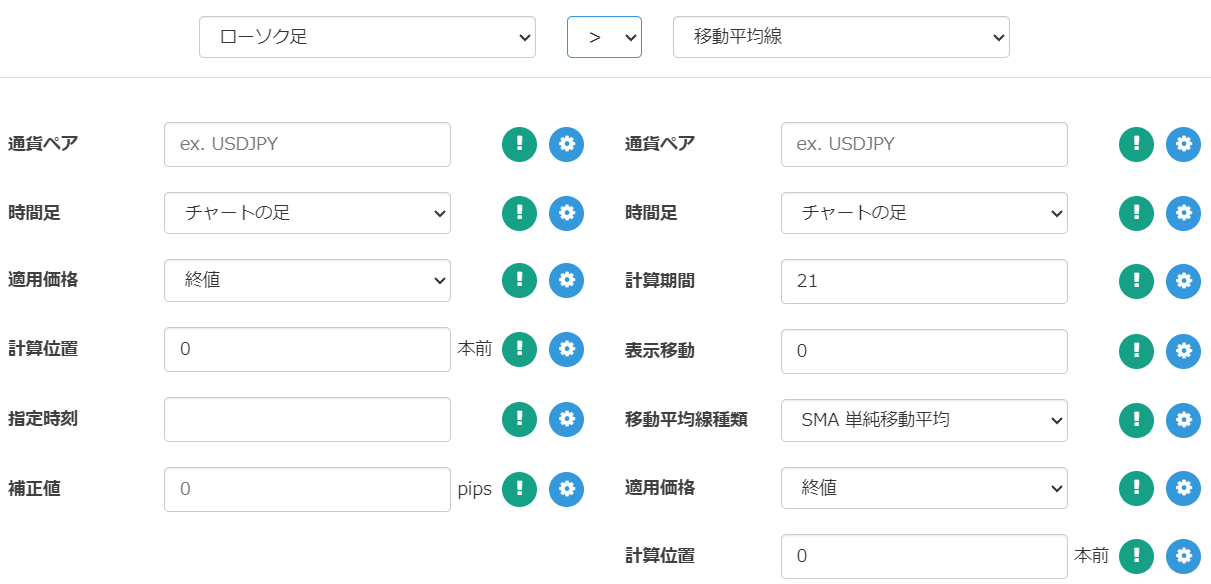
Each setting item such as “Currency Pair,” “Timeframe,” “Applied Price,” and “Calculation Position” is provided according to the selected indicator, so you can adjust them to set the optimal condition.
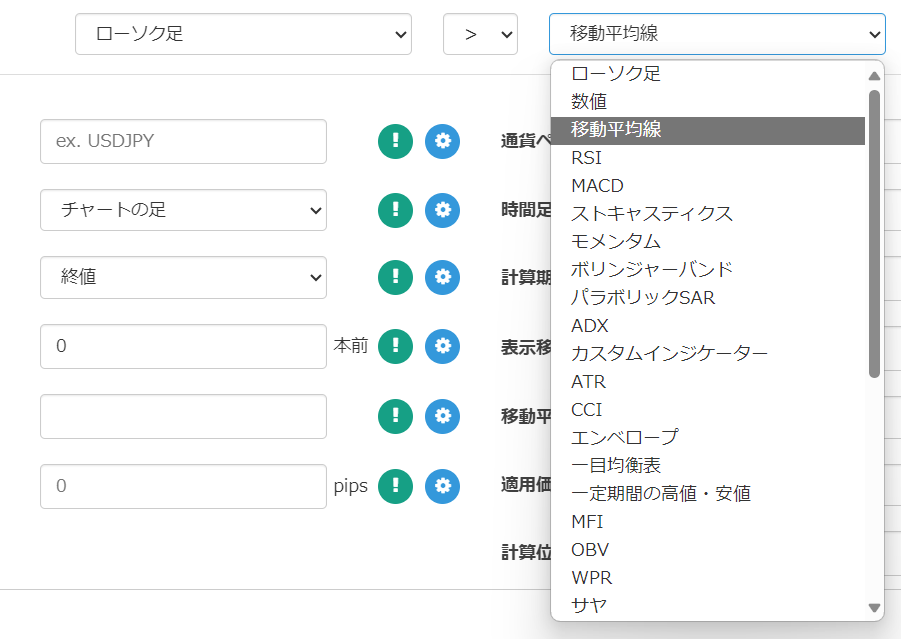
There are currently 35 indicators available for use in trading conditions. Use these along with comparison operators to implement various logics.
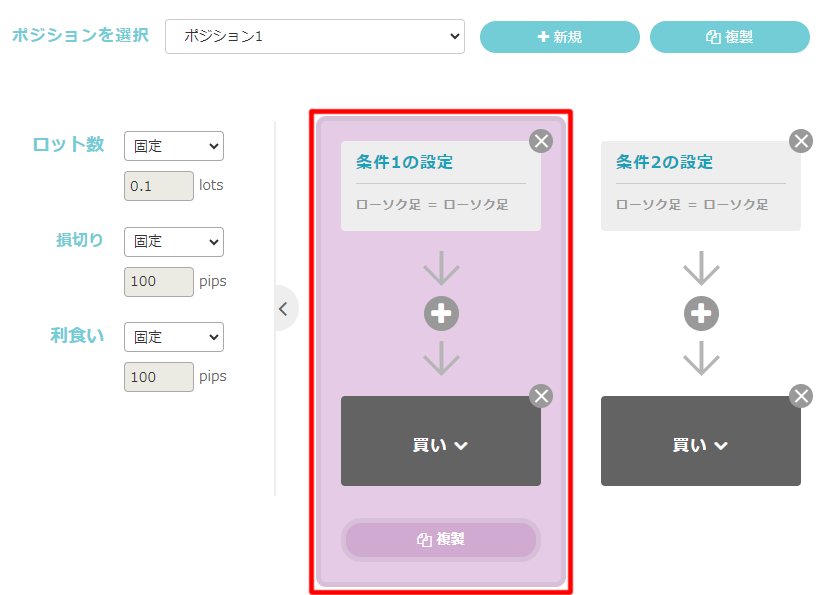
Duplicating Trading Conditions
Vertically arranged (serial) conditions below can be duplicated.It’s convenient when you want to create the same condition multiple times, so be sure to use it.
Additionally, you can move conditions left and right by drag & drop.
Conclusion
That concludes the explanation of trading conditions.
In setting trading conditions, you may encounter scenarios requiring programming-like thinking, such as logical operators and comparison operators. It may be confusing at first, but once you get used to it, you can easily create the logic.
EA Creator-created EAs may not operate as intended for various reasons, such as the combination of conditions or mis-specified conditions.
Please verify operation through backtesting and a demo account before starting on a real account.
We appreciate your continued support of EA Creator.
Questions? LABO!
 | GogoJungle LABO A Q&A service focused on programming for investments, including automated trading and indicators. In the EA Creator category, we accept questions and consultations related to EA Creator. |
Purchase Here!
 | “EA Creator” MT4/MT5 Compatible No-code development for anyone to easily create EAs, enabling fully automatic or semi-automatic trading to make your trading easier! |