
EA Tsukuru: Basic Operations and How to Use
Introduction
We are Gogojan Co., Ltd., the company operating GogoJungle / Skijan.
We will publish a series of explanatory articles for beginners about our product “EA Tsukuru”.
We will explain clearly and carefully from the basic operations of EA Tsukuru to its advanced usage.
This series is for
・Not sure where to start learning
・New to EA Tsukuru and considering purchasing
・Want to learn how to create an EA that works in practice
It is recommended for.
For this first installment, we will introduce the basic operations of EA Tsukuru.
Table of Contents
・What is EA Tsukuru?
・Create and Save an EA
・About the basic items of an EA
・Set trading conditions in the EA
・About positions
・How to use Options
・Conclusion
What is EA Tsukuru?
EA Tsukuru is an EA (Expert Advisor) development tool that supports MT4 and MT5.
You can develop an EA easily with no code.
In addition, the source code generated by EA Tsukuru includes comments describing the processing, making it ideal for learning MQL.
 | 'EA Tsukuru' MT4/MT5 Compatible No-code, anyone can easily develop an EA, with fully automated and semi-automatic trading to make your trading a little easier! |
Create and Save an EA
First, try creating and saving an EA without setting trading conditions.
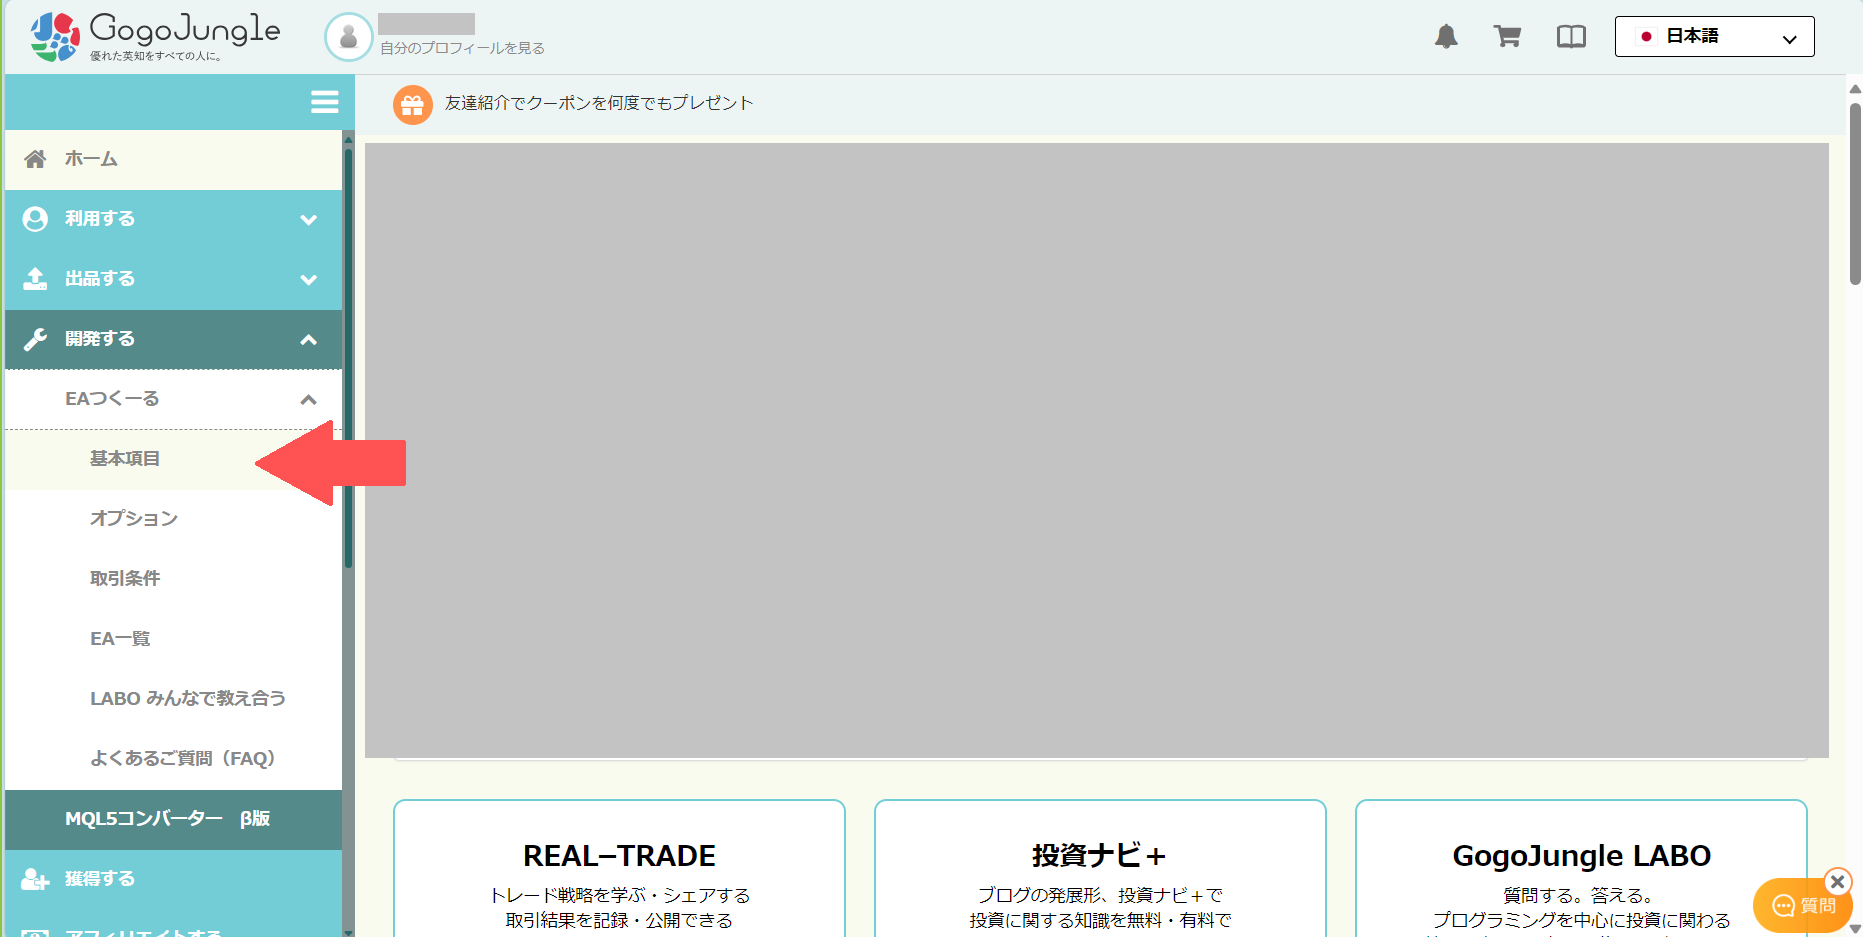
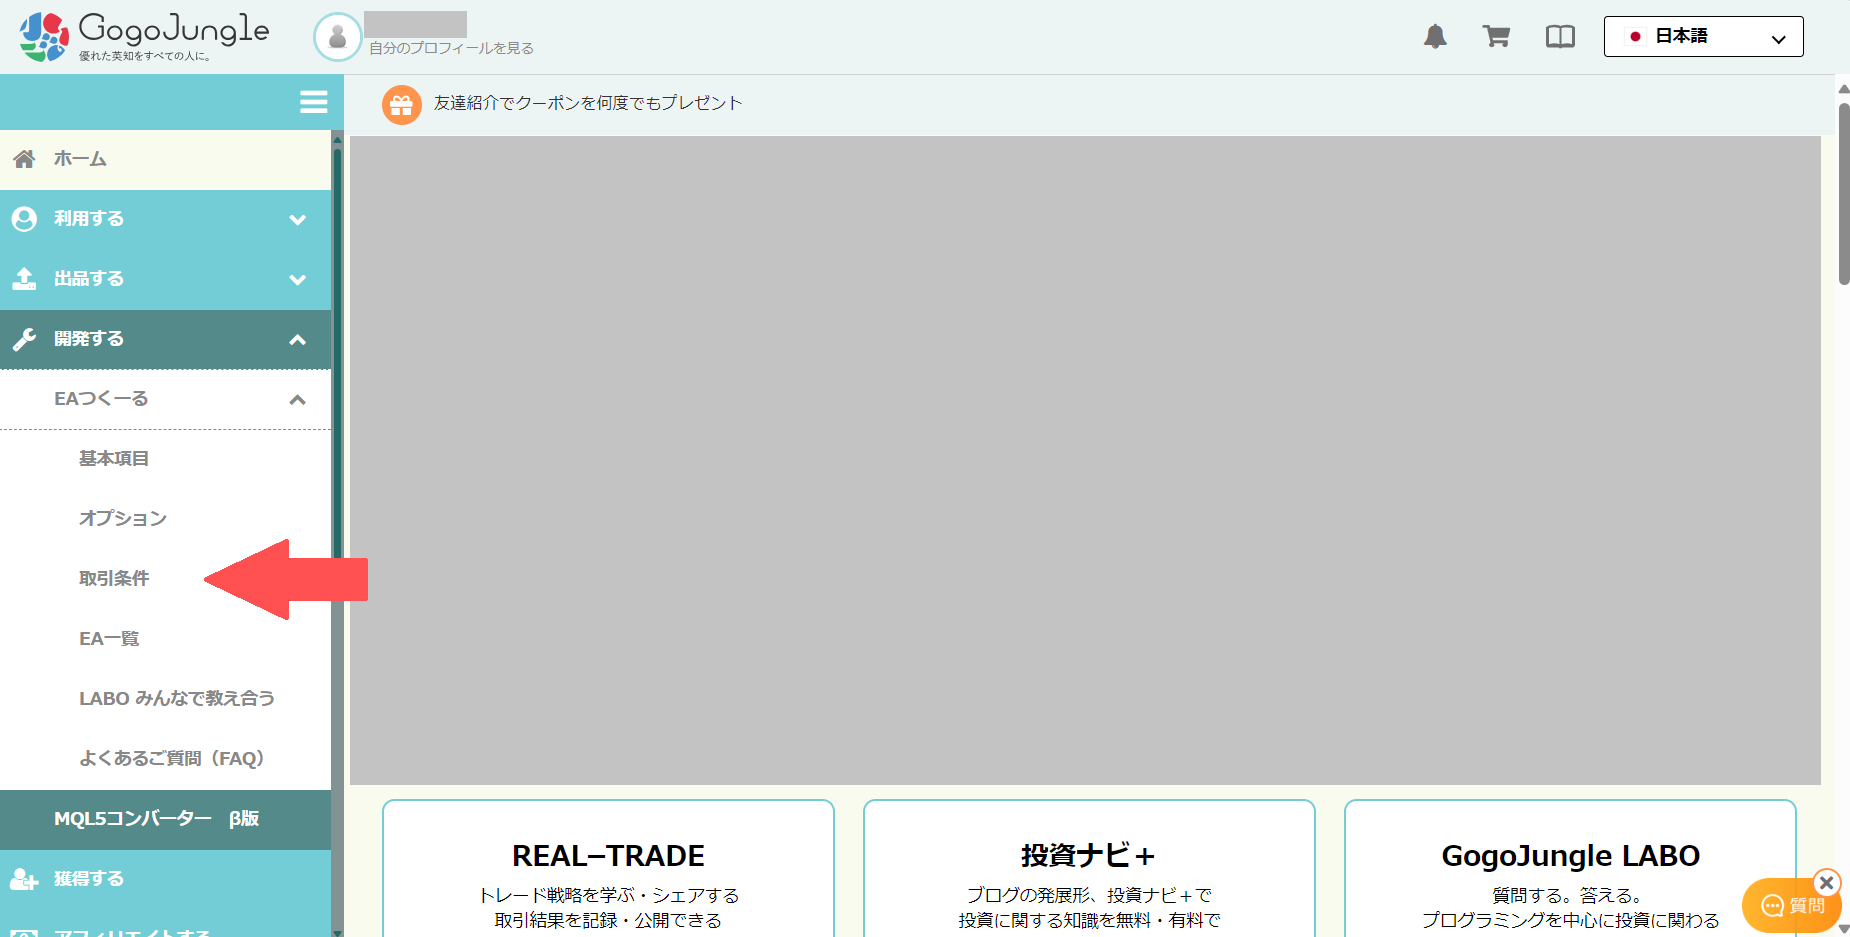
My PageOpen it and, from the side menu, select as follows.
Develop -> EA Tsukuru -> Basic Items
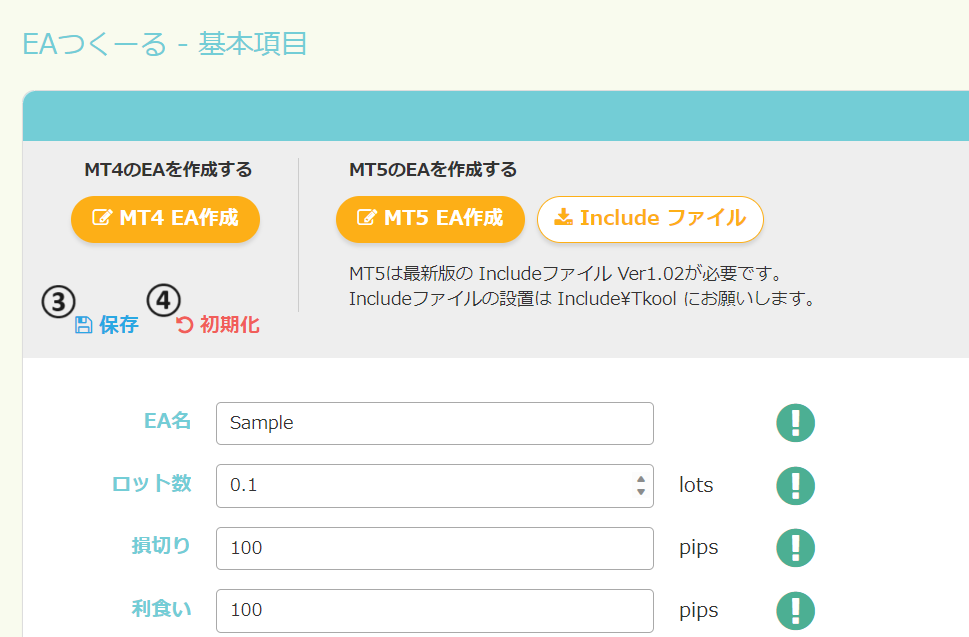
This "Basic Items" page lets you edit the information of the EA you are creating.
※If the side menu is not displayed, your browser cache may be affecting it. If re-login (log out, log in) does not resolve it, clear your browser cache or try another browser.
Set a name for the EA

First, in the "EA Name" field, enter the EA's name freely.
Create (download) the EA
Next, when you press the ② "MT4 EA Create", the auto-generated MQL file will be downloaded.
Also, the ③ "MT5 EA Create" lets you download the MT5 version of the MQL file.
※To use MT5 EAs, you need to perform the special task of installing an Include file, so please be careful.
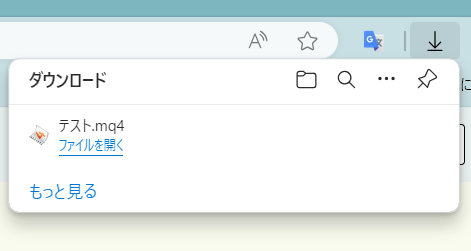
When you perform "EA Create", the browser will display as below and the file will be downloaded to the "Downloads" folder (display may vary).
Also, creating an EA this way will automatically save the EA data to your account.
Save and initialize the EA
If you want to save the in-progress EA to your account even though it's not complete yet, press "Save" (③) to save the data to your account.
④ "Initialize" resets the current edits and creates a new program.
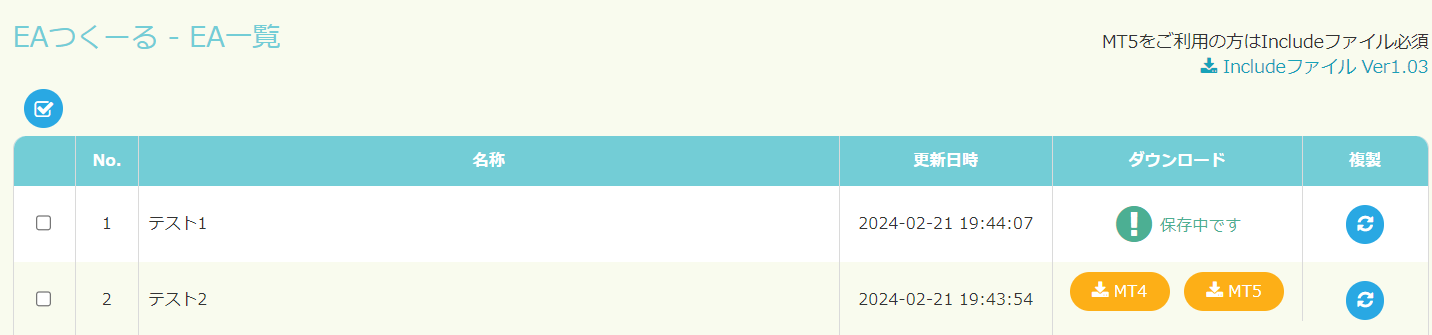
Let's check the data of the created or saved EA.
You can check it from the "EA List" in the side menu.
"Test 1" is the saved data, and "Test 2" is the data created with "MT4 EA Create". If you want to edit EAs previously created or saved, do so from "Duplicate".
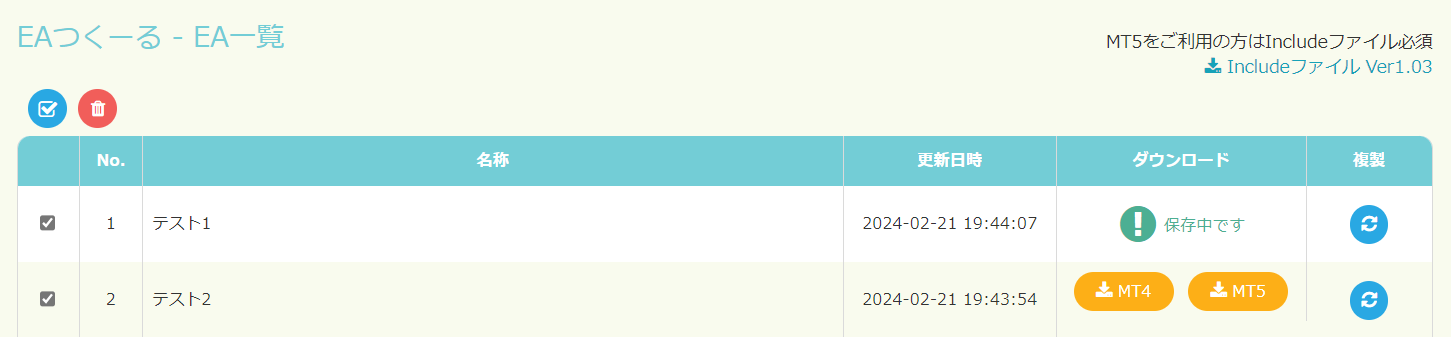
Delete an EA
Check the checkbox of the item you want to delete and press the delete button to complete deletion.
This is a slightly quirky method of creating/saving, so get used to it here.
About the basic items of the EA
Next, let's look at the remaining items on the "Basic Items" page that we used earlier to set the name.
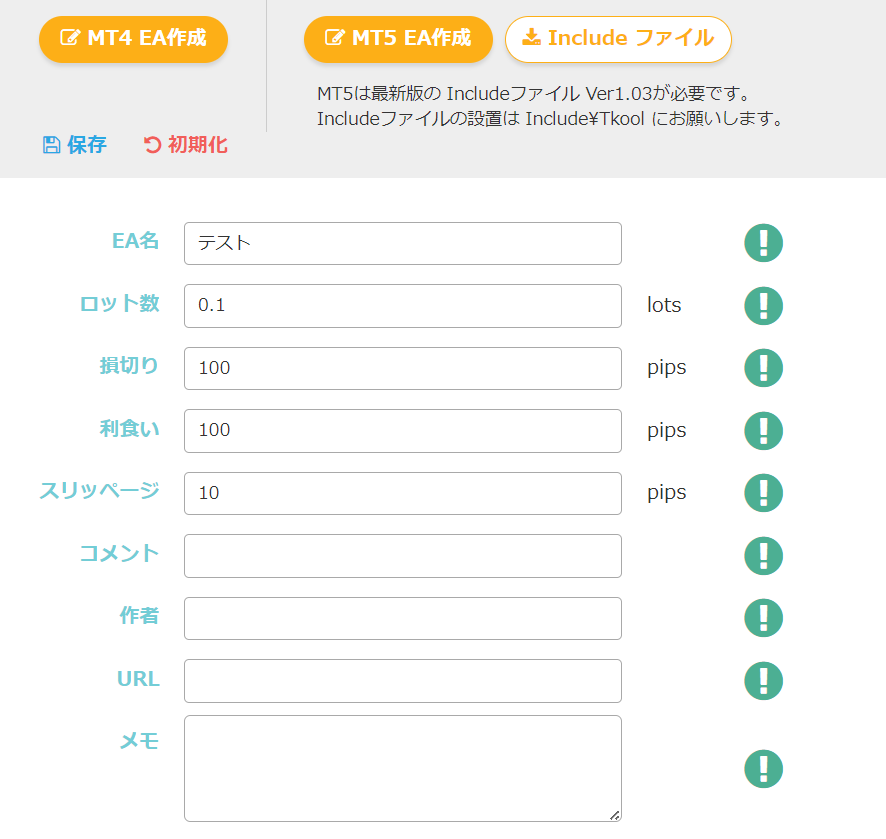
Lot size (unit: lots)
Enter the number of lots to trade.
Stop loss (unit: pips)
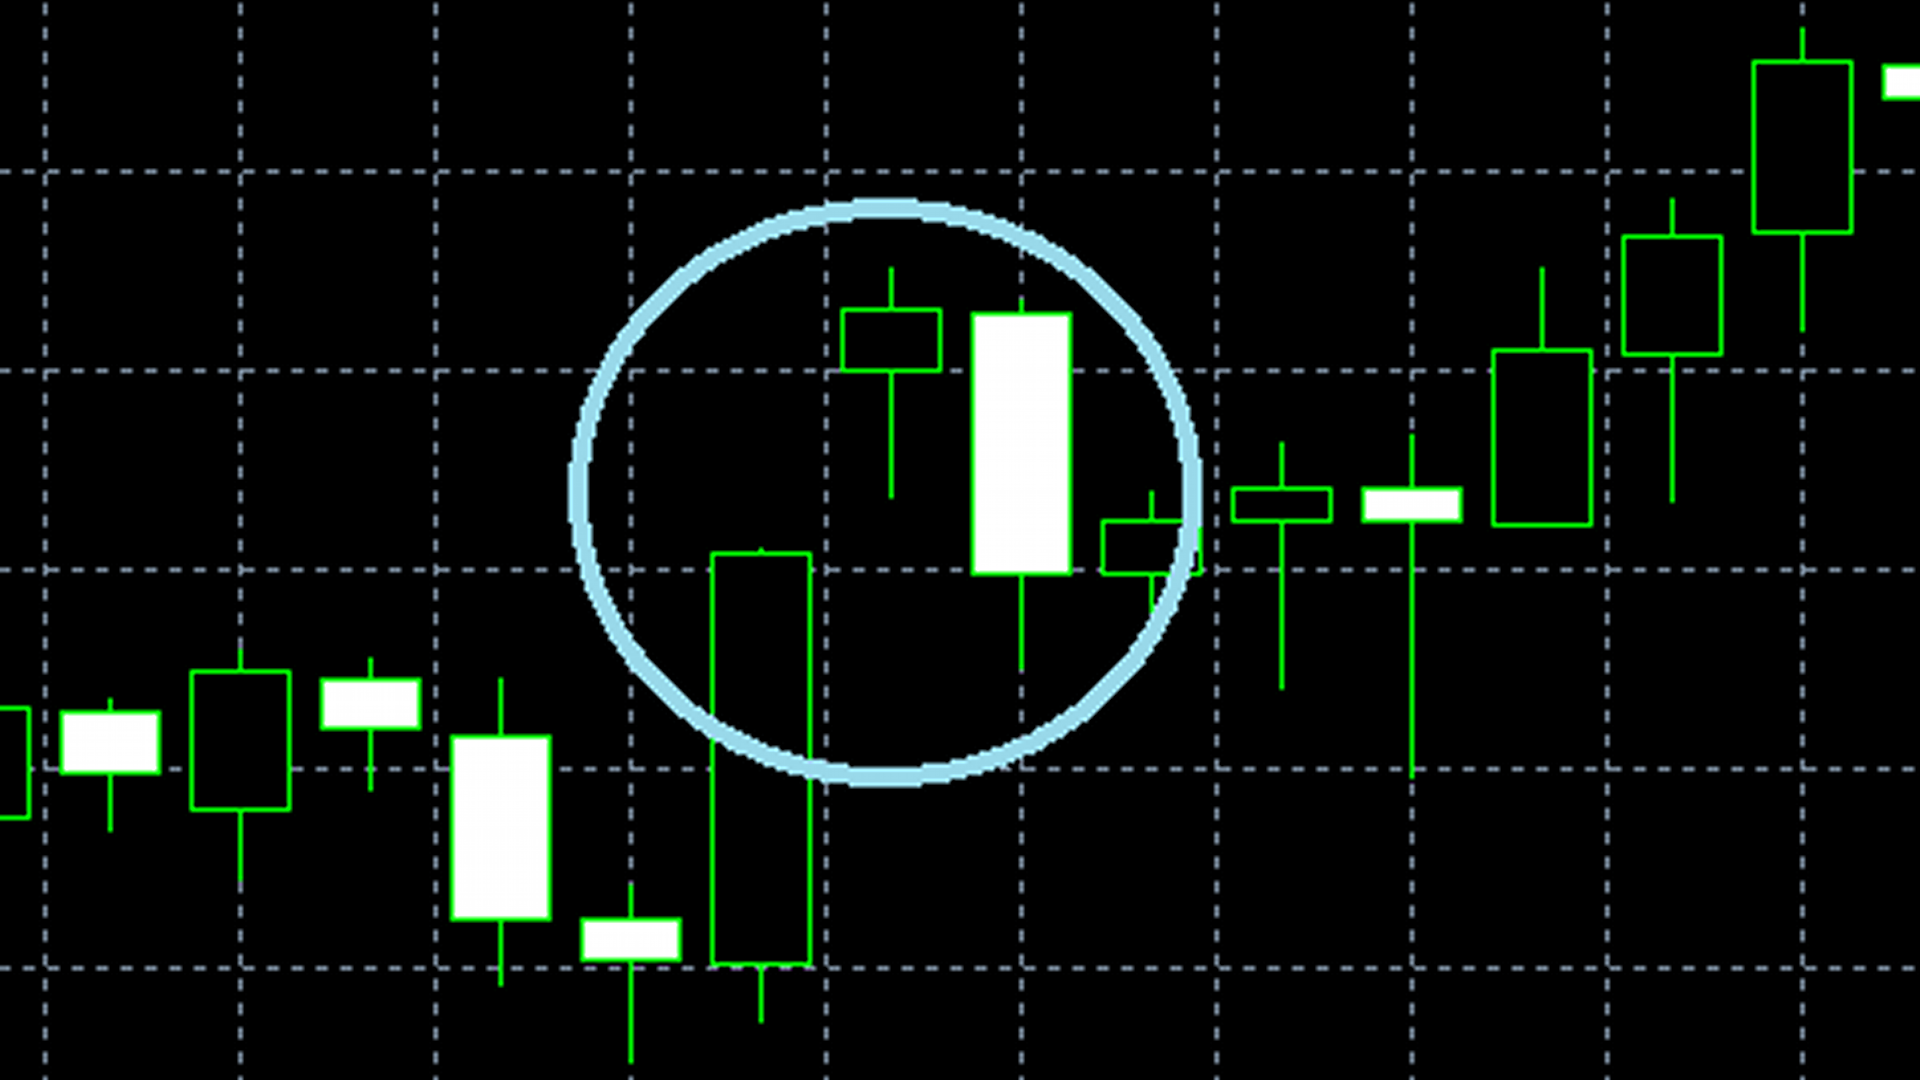
Set the stop loss. If not needed, enter 0. Stop loss is the criterion to automatically close positions to avoid excessive losses. If set to 100 pips, the position will be closed when unrealized loss exceeds 100 pips.
Take profit (unit: pips)
Set take profit. If not needed, enter 0. Take profit is the criterion to automatically lock in profits. If set to 100 pips, the position will be closed when unrealized profit exceeds 100 pips.
※The above "Stop Loss" and "Take Profit" may conflict with the options "Reverse/Flip", "Averaging Down" "Pyramiding", "Close All" are in conflict, so please be careful with combinations
Slippage (unit: pips)
You can set the allowed difference between the order price and the actual execution price. If the execution price deviates by more than the specified pips, the order will be canceled. If you want to ensure execution, enter a larger value; if you want to reduce slippage, enter a smaller value.
Comment
You can add a comment to the position. It does not directly affect performance, but it is useful for manual position management, etc. If not needed, leave blank.
Author
Set the author name displayed on the EA's property screen. If not needed, leaving blank is fine.
URL
On the EA property screen, you can specify a URL to open when clicking the author name. It can link to a sales site or a reference site.
If not needed, leaving blank is fine.
Notes
You can leave development notes, which are useful for version history. If not needed, leaving blank is fine.
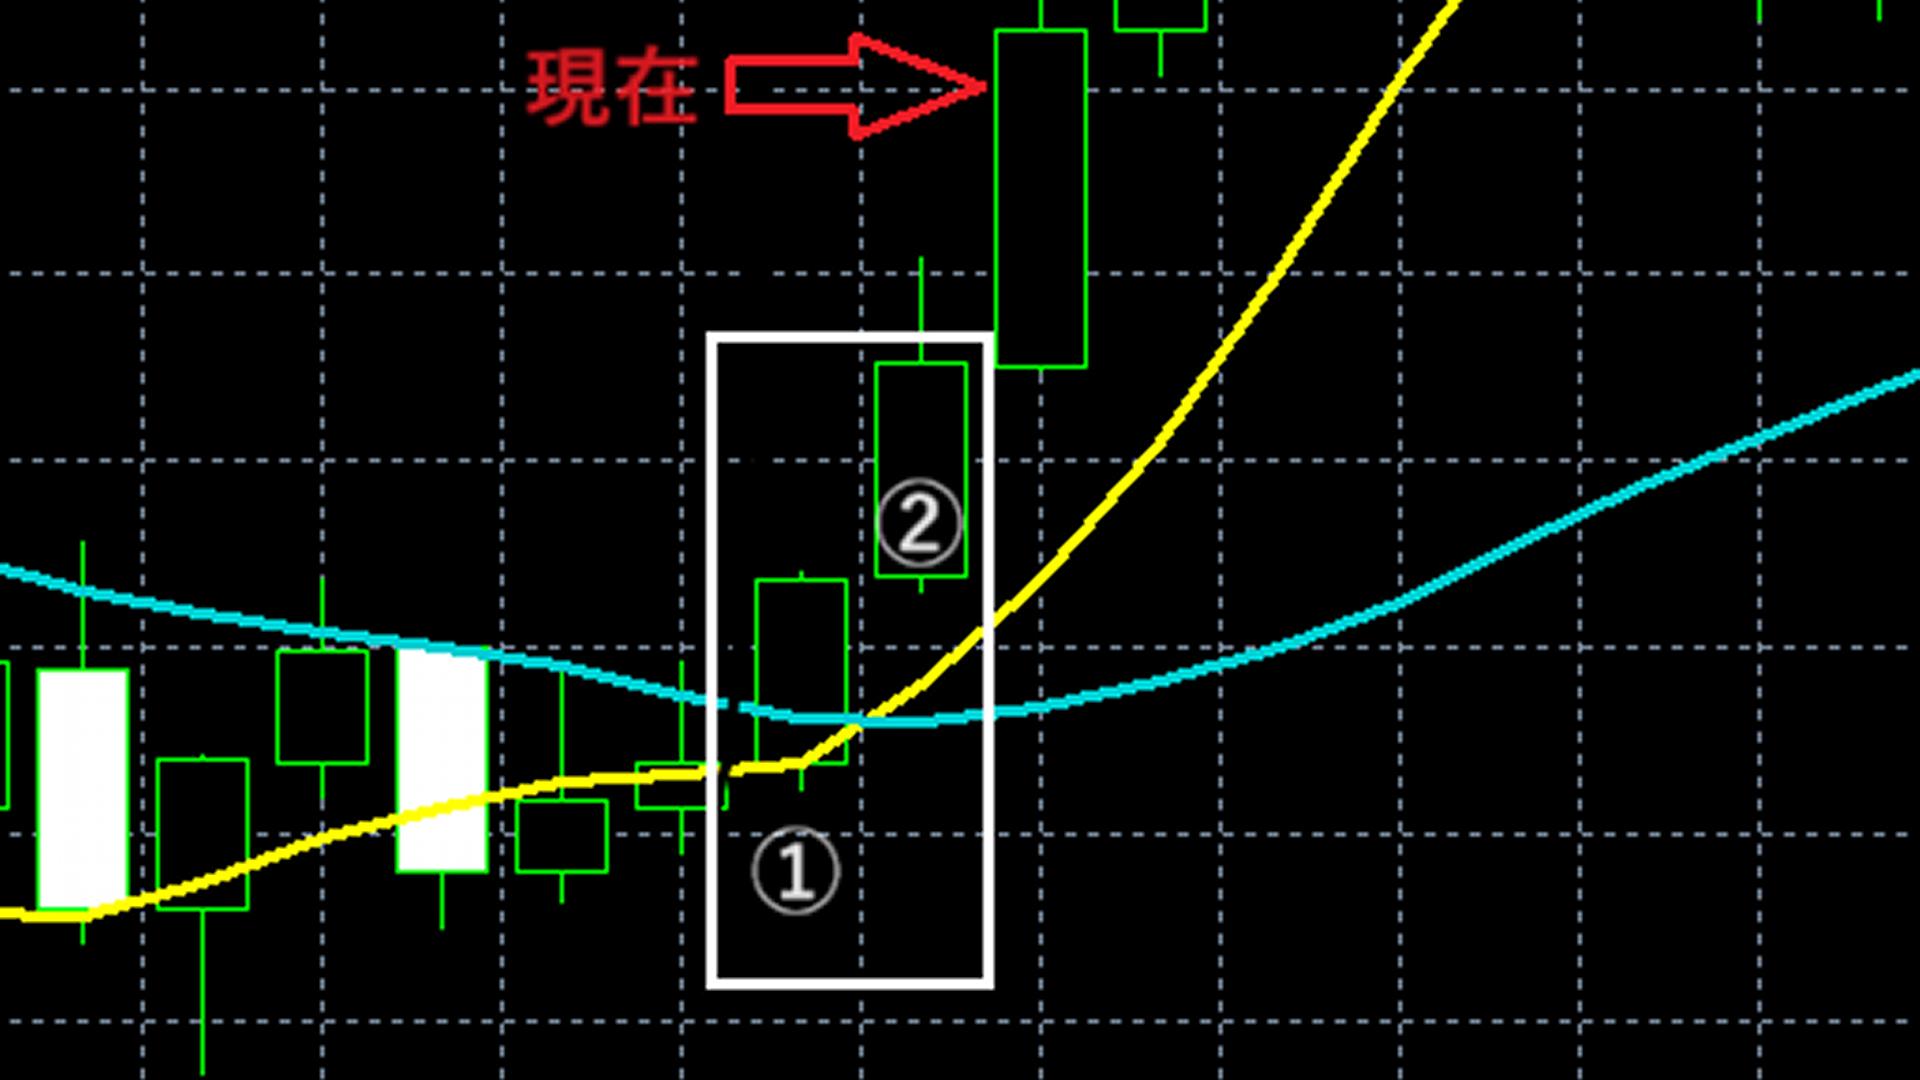
Set trading conditions for the EA
Next, let's look at how to set trading conditions.
Below is the screen for setting conditions.
On this screen, when the conditions you set are met, you can program to enter a buy or sell position, or to close a position.The trading condition settings will be detailed in later articles.
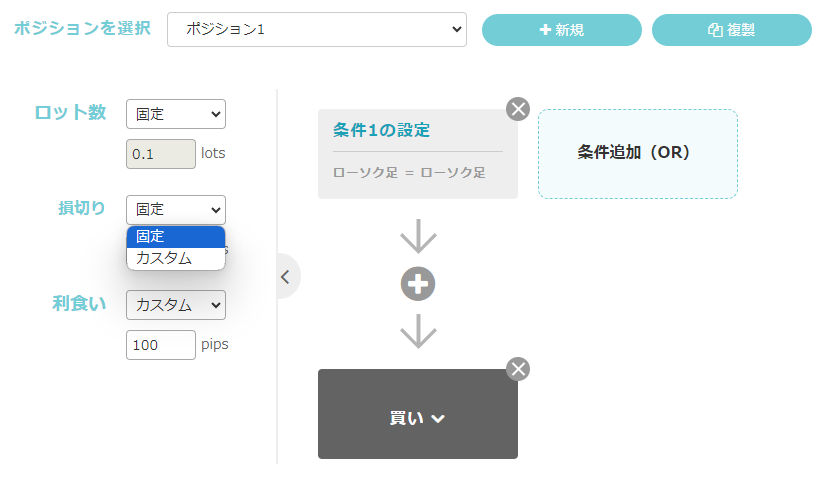
About positions
From the "New" item on the trading conditions screen, you can add a position.
If you want to copy the conditions of the currently selected position and add them, you can do so from "Duplicate".
Also, the added positions can be deleted from "Delete".

With the steps above, you can set entry and exit conditions for multiple positions.

For each position (e.g., Position 1), the maximum number of positions held under its conditions is 1, and if you already hold a position due to Position 1’s conditions, even if Position 1’s conditions are met again, you will not enter a new position.
Example: In a combination like the following, you would hold 1 position from Position 1 and 1 position from Position 2, for a total maximum of 2 positions.
Position 1: Condition 1, Condition 2,Condition 3, Condition 4
Position 2:Condition 1, Condition 2,Condition 3, Condition 4
※When using the averaging down and pyramiding options, an exceptional case may occur where multiple entries are made for a single position (Position 1).
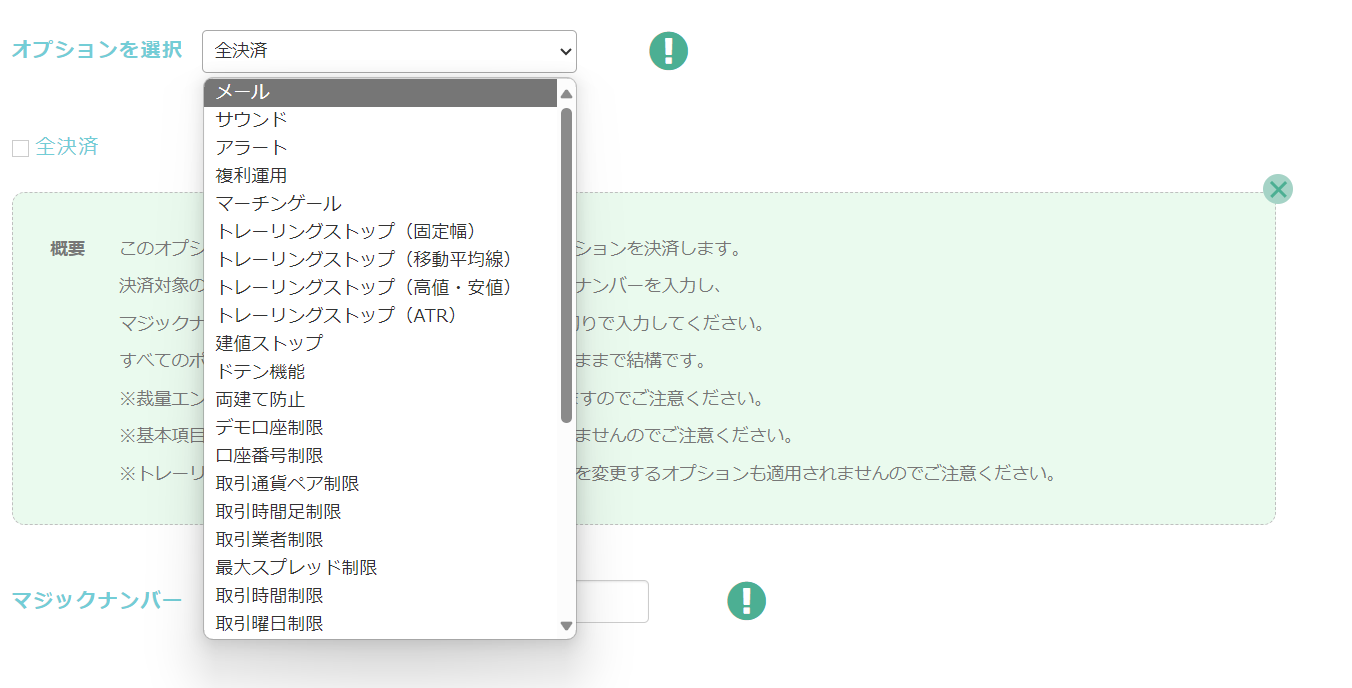
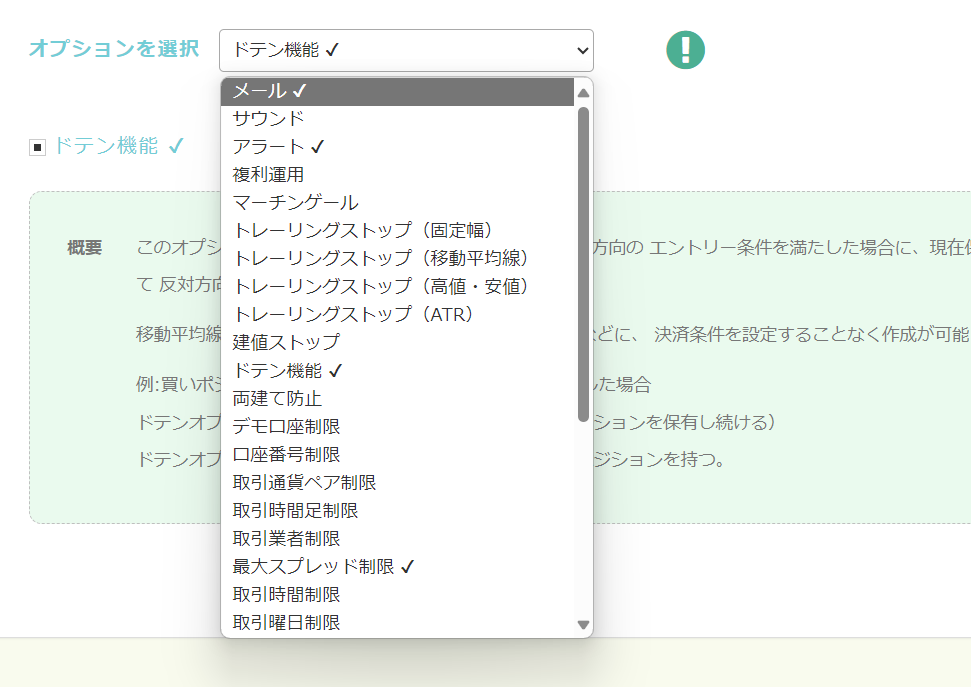
How to Use Options
Finally, let's look at how to configure options.
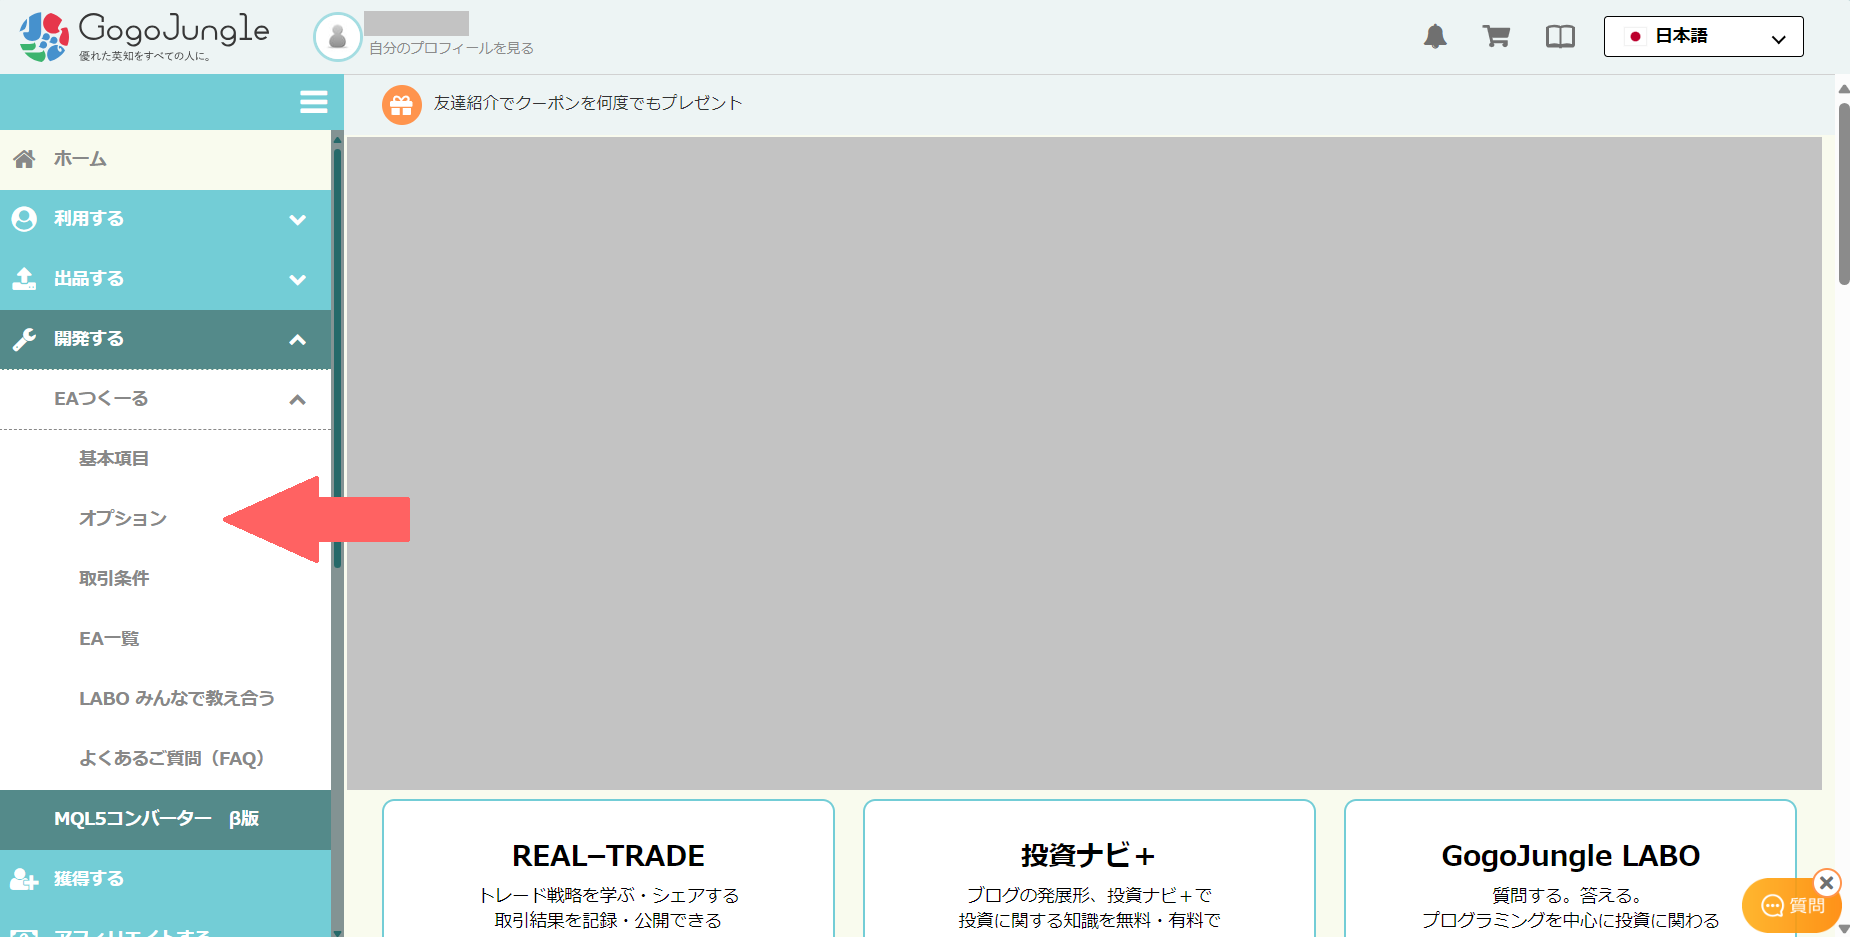
Setting options
'Choose Options' screen lets you add multiple special processing to the EA. There are many options available, which will be introduced in future articles.
You can enable multiple options simultaneously, and you can verify what's enabled by the check marks.
Conclusion
That concludes the basic operations and usage of EA Tsukuru.
As there are many features and not everything is explained yet, in future series we will actually create EAs and explain the features in detail. Thank you for your continued support.
EAs created with EA Tsukuru may not operate as intended due to various reasons such as combination of conditions or errors in setting conditions.
Please verify operation with backtests and a demo account before starting on a real account.
We appreciate your continued support of EA Tsukuru.
Questions? See LABO!
 | GogoJungle LABO An Q&A service focused on programming for investment, such as automated trading and indicators. In the EA Tsukuru category, we accept questions and consultations regarding EA Tsukuru. |
Purchase here!
| 'EA Tsukuru' MT4/MT5 Compatible No-code, anyone can easily develop an EA, with fully automatic and semi-automatic trading to make your trading a little easier! |