
What to do before and after the 7th Entry [FX Planner]

Until now, I think we have understood the definition, concept, and usage of the area method. The remaining steps involve repeatedly trading with limited risk, but there are points you must keep in mind when entering. This time, FX planners will teach you the secrets to success with the area method.
【The Essence of the Area Method: Practical Edition [FX Planner]】
・Episode 1: How to find high-advantage places from charts(Available for free)
・Episode 2: Thorough analysis of charts from candlesticks
・Episode 3: Thorough analysis of charts from candlesticks – Area Method Explanation –
・Episode 4: How to think about and determine the acceptable range
・Episode 5: How to use the set acceptable range with the area method
・Episode 6: How to narrow the area’s price range to the acceptable range
・Episode 7: Things to do before and after entry
・Episode 8: Adjusting the area and decision criteria
【Related Articles】
・The Essence of Technical Analysis | Episode 1: Grasp the psychology of buyers and sellers [FX Planner]
Episode 7 Index
1. What is needed to enter?
2. What can be done after entry. The option to escape
What is needed to enter?
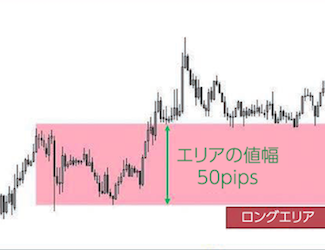
Up to now, FX Planner has confidently explained the area method, including its concepts, definitions, and actual usage. Summarizing the features of the area method: “identify chart formations with high advantage and repeatedly trade with limited risk.”
And what we will convey this time is that “at the moment of entry, the trade is already 95% complete.” We want you to understand what it means for the trade to be already complete even before taking a position.