
How to use the set tolerance range with area method [FX Planner]
This time, we will provide a lecture on how to use the tolerance range discussed in the previous article with the area method. If you memorize this, you will be able to repeatedly trade with limited risk. In addition, you will acquire the very important concept in FX of making overall profits, so be sure to master it here.
【The Essence of the Area Method — Practical Edition [FX Planner]】
・Episode 1: How to find highly advantageous places within the chart(free to view)
・Episode 2: Thoroughly analyze the chart from candlesticks
・Episode 3: Thoroughly analyze the chart from candlesticks — Area Method Explanation —
・Episode 4: How to think about and decide the tolerance range
・Episode 5: How to use the set tolerance range with the area method
・Episode 6: How to narrow the area’s price range to the tolerance range
・Episode 7: What to do before and after entry
・Episode 8: Area corrections and decision criteria
【Related Articles】
・The Essence of Technical Analysis | Episode 1: Grasp the psychology of buyers and sellers [FX Planner]
Episode 5 Table of Contents
1. Area width by time frame
2. Area width and tolerance range
3. Connecting entry from the stop-out line
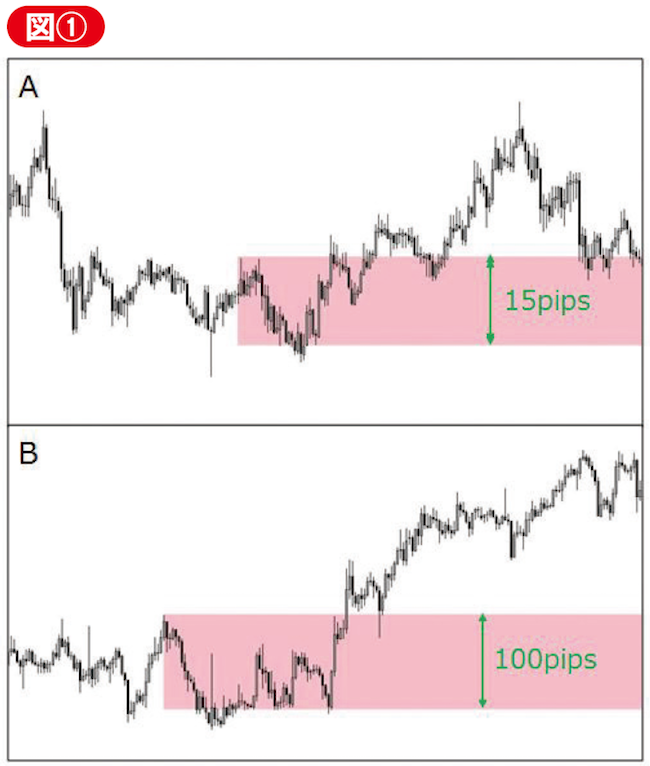
Area Width by Time Frame
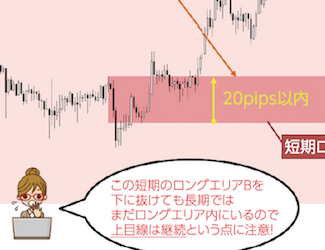
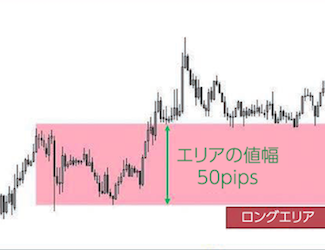
As explained so far, the long area and short area appearing in the area method are defined by the support and resistance expressed as price ranges. Naturally, you aim to enter from those areas, but there is one thing you must consider: the “area width.” In the area method, you can analyze the chart in the same way across all time frames, but the width of the area you set varies greatly depending on the time frame.