
About Entries, Profit-taking, and Stop-loss... [Basics of the Top-Bottom Chart (6 of 8)]
Entry, Take Profit, and Stop Loss on the TenJ failure chart
■ How far should we use the arrow signs?
Suppose we trade everything strictly according to the signals on the 1-hour chart,
We performed a backtest for the past year (2016/06/24~2017/06/23) under the following conditions.
【Trading Conditions】
Currency pair: USD/JPY (spread 10) Time frame: 1-hour chart
Entry lot size: 0.1 Maximum positions: 1
Stop loss: 100 pips Take profit: 300 pips
Entry/Settlement Conditions:
Because the maximum number of positions is 1, when there is an entered position,
we do not take new positions until the current position is settled.
(That is, ignore subsequent same-direction signals after entry).
If an opposite-direction arrow signal appears while holding a position, we forcibly close the position,
and simultaneously take a position in the opposite direction.
When the stop loss/take profit levels are reached and there is no position, if a new arrow signal appears,
we take a new position in that direction.
The backtest results are as follows:


The result shows an annual return of 17%, but it is not an exceptionally high number; it is at a level of
neither particularly good nor bad.
This is, of course, a natural result, and the reason is that,
except for the white signs that light up in the top/bottom zone, the green/red trend-following signs light up even in consolidation or flat markets,
and faithfully follow the movements of the Stochastics, so, in other words, many unnecessary signals are inevitably generated, resulting in
a large number of unnecessary trades.This includes many nonessential trades..
The shorter the time frame, the stronger this tendency becomes. Therefore, the above backtest includes many of those parts. Conversely, if you avoid entries on green/red signals during consolidation or sideways markets, you can achieve results far surpassing those of the backtest.
In the price movement of the chart, the white signal may not light up, and earlier it may reverse in the opposite direction, so to compensate for that, green/red signals are provided.
Therefore, these are not entry points but indicators of directionality, and are positioned as such with design thinking.
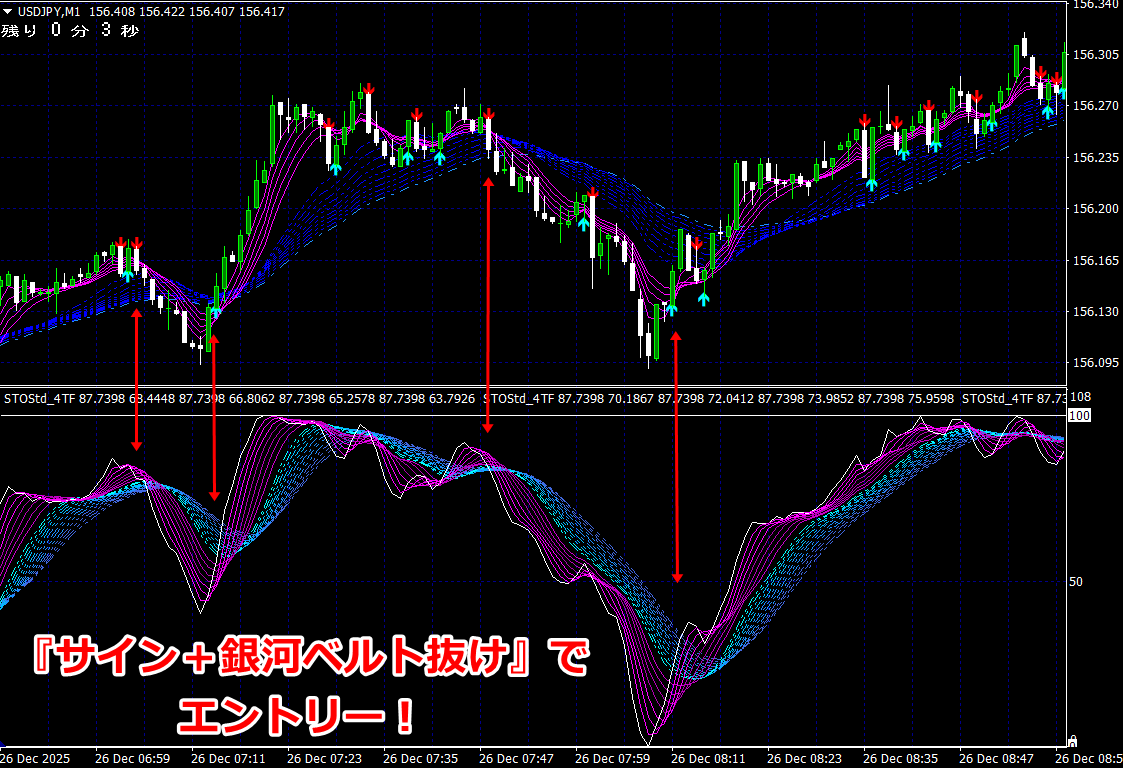
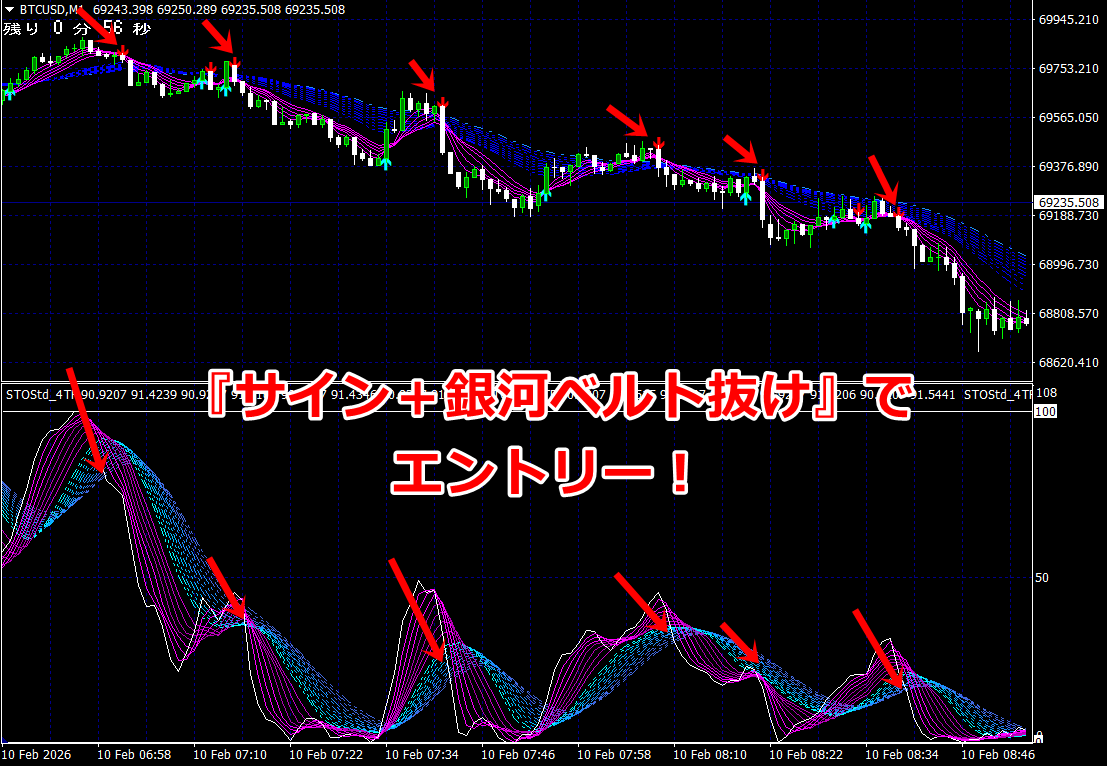
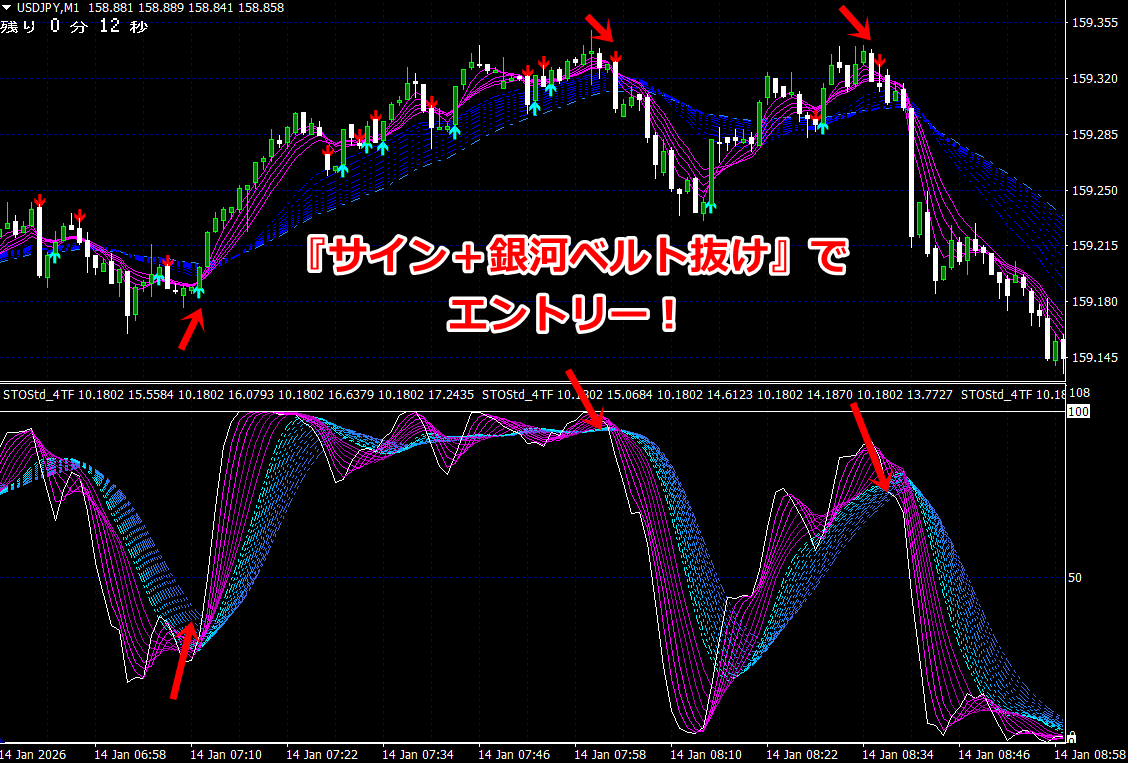
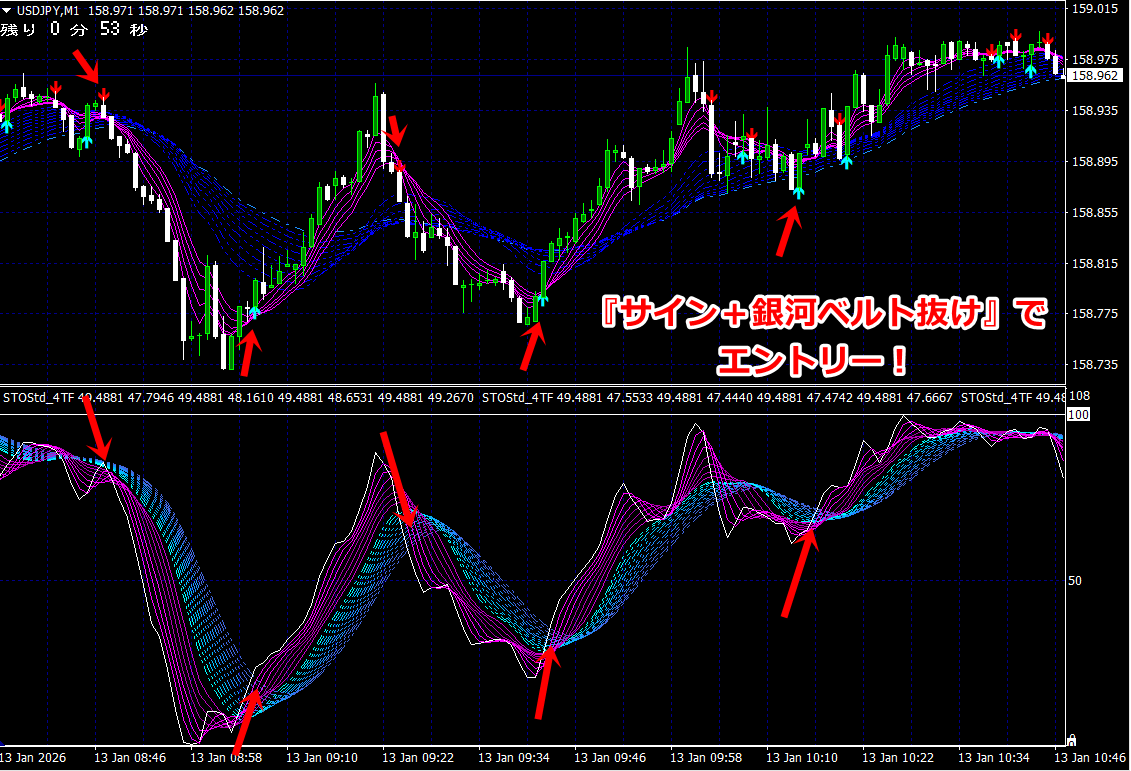
■ Positioning of arrow signs in the TenJ failure chart
In the TenJ failure chart, entries using arrow signs are possible, but the entry point itself is not shown; rather, the arrow indicates turning points of the波動 of the Stochastic lines.
White arrow – in the top zone and bottom zone, indicating reverse-signal signs, which are likely to indicate tops and bottoms, but using it as an entry point carries risk.
For using as a take-profit point when you hold a position.
GreenRed
We recommend using them as entry points.
■ Entries and exits (take profit) with arrow signs
This manual recommends a trading method that minimizes risk while maximizing the advantages of the TenJ failure chart through entry and exit strategies.
<Entry>
After the white sign lights up in the top or bottom zone, when the stock of three pink lines and three green lines of the stochastic cross and all lines cross or are crossing above the blue line, follow the green/red signs to enter.
Exit when the white sign or when several lines of the stochastic reach their upper limit.
In simple terms,
When a clear move appears,
Enter with green/red signs Take profit with the white sign |
This is the essence.
For entries/exits, it is also useful to refer to the chart of shorter timeframes below the hourly chart and the movements of the stochastic.
Buy entry from the bottom zone example ①

Buy entry from the bottom zone example ②

Buy entry from the bottom zone example ③

Buy entry from the bottom zone example ④

Buy entry from the bottom zone example ⑤

Buy entry from the bottom zone example ⑥

In this manual, as a means of risk avoidance, white signs are recommended only as take-profit points; however, once you become accustomed to the shape of the stochastic waves and can determine the TenJ failure chart with confidence without relying on signs, your own judgment will align with the white signs.
If you already hold a position, the white sign is a take-profit point, so you have already taken profit in that case, so you can continue to enter on a white sign if appropriate.
If that happens, it becomes the goal of the TenJ failure chart and the essence of the Ten⇔Bottom one-shot trade becomes possible.
One trade between Ten and Bottom


■ About take-profit width and stop-loss width
The basic idea for take-profit, as described above, is to take profits with the white sign, but
in actual order entries, it is normal to set take-profit and stop-loss widths in advance.
On the TenJ failure chart, the hourly chart is the standard, so the optimal values from historical data are
Stop-loss 100 pips, Take-profit 300 pips (see backtest on page 16); in daily trading, a more moderate setting may be preferable.
Also, although the chart itself uses the hourly chart as the base, at the time of actual order entry, shorter timeframes below the hour are also used to better time entries, so we provide a guideline of Stop-Loss and Take-Profit widths corresponding to each timeframe.
(For entry lot size 0.10, positions 1)
| Stop-Loss / Take-Profit | Take-Profit |
1 Timeframe | 60–100 pips | 200~300 pips |
30 minutes | 40~60 pips | 100~200 pips |
15 minutes | 20~40 pips | 50~100 pips |
1–5 minutes | 20 pips | 50 pips |
┏━┓
┃★┃ Watching “TenJ Failure Chart MT4” in a video
┗━┻━━━━━━━━━━━━━━━
Where exactly do the signs appear?
→ We tested trading in a backtest.